Monday, May 30, 2011

#294 Preserved Orange Slices (part 1)

These oranges are flavoured with a heady mix of cinnamon, mace and cloves; quite a wintery combination, I suppose. In Victorian times, the orange was the most prized Christmas gift and British children would have waited with baited breath to get their hands on them. This did not apply to Irish children though – a little earlier in history, William of Orange's extreme anti-Catholic laws were so unpopular that the Irish people made a declaration that no orange tree would ever be planted in Irish soil.
William III of Orange (aka 'King Billy' by Irish Protestants)

In Europe, the best oranges have always come from Spain, and so it is no surprise that the first orange plantation in America was also Spanish. It was, of course, in Florida and it was built in 1579. After a few years of settlement, orange trees were discovered all over the forests, causing the surprised Spanish settlers to conclude that the orange must have been native to America! It turned out to not be the case – Native Americans had been stealing oranges and spitting the pips as they ate them.

I had been planning on doing these preserved oranges for a while as they are an accompaniment to pork and duck, my two new favourite meats, thanks to recent recipes here in the blog. I’ve only just gotten round to making them because a spice required for the recipe is mace – in the form of blades. Tricky, as supermarkets don’t stock them. However, now I have a car I could pop to The Heights area of Houston and visit Penzey’s spices. What a great shop! Every spice and spice blend you could ever need. Luckily, there is a store in St Louis, so I can keep myself stocked up when I move there. My favourite bit was Granny’s Kitchen which had all the baking spices.

Anyway, enough waffle. Here’s the recipe...

Begin by slicing 10 large oranges – keep them thick, about a centimetre is good – place them in a large pan and cover them with water.
Bring to a boil, cover and simmer gently for 30 to 40 minutes until the peel has softened. Don’t stir the oranges around as they will break up. Meanwhile, in another pan, dissolve 2 ½ pounds of granulated sugar in a pint of white wine vinegar. Add 1 ½ sticks cinnamon, a heaped teaspoon of cloves and 6 blades of mace to the vinegar syrup and boil for a total of 3 or 4 minutes.
When the oranges are done, drain them, reserving the orange liquor. Return the oranges to their pan and pour over the syrup to cover – if there isn’t enough, use some of the orange liquor. Cover, bring to simmering point and cook gently for a further 25 to 30 minutes.
Take off the heat and leave for 24 hours. Next day, pot in sterilised jars. Top up with syrup over the next or two, should they need to be. Here’s the catch though folks: you now have to leave them for at least 6 weeks to mature! When the time is up, they can be served with hot or cold pork, ham or duck. The syrup also makes a good sauce for duck too. Apparently.

#294 Preserved Orange Slices. Well we shall have to have a bit of patience over these. It’s strange to think that when they are ready, I’ll be living in St Louis. I can say that the syrup is delicious though. Look here for the results.

Wednesday, May 18, 2011

#293 Mrs Beeton’s Chocolate Soufflé


I've cooked quite a few – and eaten quite a few – soufflés in my time, but this is my first sweet one. It comes from the great Mrs Beeton's Book of Household Management, or to give its full title, The Book of Household Management Comprising information for the Mistress, Housekeeper, Cook, Kitchen-Maid, Butler, Footman, Coachman, Valet, Upper and Under House-Maids, Lady's-Maid, Maid-of-all-Work, Laundry-Maid, Nurse and Nurse-Maid, Monthly Wet and Sick Nurses, etc. etc.—also Sanitary, Medical, & Legal Memoranda: with a History of the Origin, Properties, and Uses of all Things Connected with Home Life and Comfort. Those Victorians do go on, don't they? The book is actually a collection of articles that she published in The Englishwoman's Domestic Magazine between 1859 and 1861, and although she conjures up imaginations of austerity and matronliness, she actually died at the rather young age of 46 of tuberculosis, or consumption as the Victorians called it, and her great masterwork was published when she was just thirty years of age.
I've been putting off doing the sweet soufflés not because I don't like the idea of them, but because I like to make desserts in advance and soufflés require a certain amount of time and concentration before baking immediately – not something I have the inclination to attempt after cooking a main meal (and perhaps polishing off a few glasses of wine). However, I thought that it was about time I tackled one, and it turns out that it is quite straight-forward, and although the whisking of egg whites and folding them into the chocolate mixture does need to be done at the last minute, much can be prepared in advance.
Preheat your oven to 190°C (375°F) and butter a cake tin (I used a 6" one), so you can pop the soufflé straight into the oven. Separate four eggs, place the whites in a large bowl, and beat into the yolks 3 heaped teaspoons of caster sugar, a heaped teaspoon flour and 3 ounces of good quality grated dark chocolate. Now whisk the egg whites to the stiff-peak stage, remove a spoonful of egg white and mix it into the chocolate mixture to 'slacken' it. This makes it easier to fold the rest of mixture into the egg whites without losing the air. It is also worth mentioning that using a metal spoon to fold in your egg whites also helps to reduce loss of air. Pour the mix into the buttered cake tin, scatter a little more caster sugar and bake for 20 minutes. Mrs Beeton says to pin a napkin around the tin and bring it to the table straight away before it falls. Serve with pouring cream.
#293 Mrs Beeton's Chocolate Soufflé. This was a very good soufflé. It wasn't very sweet, which really showed off the bitter chocolate taste. In fact is tasted just like a whipped up mug of cocoa. The chilled cream – which Americans don't seem to use on their desserts – in combination with the hot soufflé, really set it off. The only problem was that 20 minutes was a little too long; the centre of the soufflé wasn't soft, as I like it to be, so it'll be 15 minutes in the future. That's my only gripe though. 7.5/10.

Monday, May 16, 2011

#292 Isle of Man Salt Duck


After returning from my little trip back to England and Ireland, I wanted to cook something that evoked some memories of it whilst all was still fresh in my mind. There are no Irish recipes in English Food, but there are a couple of Manx recipes (if you are from the Isle of Man, you are Manx). When Hugh and I flew the short distance from Belfast to Liverpool, we looked out the window and he told me about the bits of coastline and other features, and of course the Isle of Man was pointed out, looking surprisingly small. I've never managed to go to the Isle of Man, but it looked very pretty from the air.

This is apparently a traditional Manx cured meat dish, but I did a quick internet search and could find any references to it at all, so I can't give you any background information I'm afraid, Grigsoners. The cure is very simple to do; you simply have to pack coarse sea salt inside and outside of a duck 24-hours before you want to cook it. I assume in the days when this was done for actual preservation of meat, rather than for flavour, the duck could have been cured for several days or weeks. When you are ready to cook it, brush off the salt, rinsing off any tricky to remove bits and place in a pot with enough water to barely cover it.


Cover, bring to a simmer and let it happily gurgle away for between an hour and ninety minutes, depending on the size. I am always worried about doing the boiled meat recipes in the book, I always think they are going to come out insipid and boring, especially in this case as there was no call for any stock vegetables or seasoning with spices. I invited my friends Danny and Eric around to sample the delights – hoping it would taste okay…


If you like, you can cure your duck in brine instead – check out the recipe and instructions on brining meat here.

While the duck is simmering away gently, you can be getting on with the accompaniments: an onion sauce and colcannon (an Irish invention of potatoes and either cabbage or kale mashed together).

For the onion sauce, chop four large onions and add them to a pan with just enough water to cover them, season, cover with a lid, and allow them to simmer for fifteen minutes. Drain them over a bowl, so that the cooking liquor is saved. Add half a pint of milk and just under a pint of the liquor to the pan along with half an ounce of butter and bring to a simmer. Measure two level tablespoons of cornflour and slake it with a little more cold milk and whisk it into the hot sauce; it will thicken instantly. Simmer for a few more minutes so that the cornflour can cook out. Add the onions back to the pan and season with plenty of salt and pepper – very important here to season it very well – plus the grated rind of a lemon. Add more liquor or milk if it becomes too thick. This sauce can be (and was!) made in advance – make sure you keep it covered with a lid or some cling film to prevent a skin from forming if you do.

For the colcannon, boil equal amounts of potato and kale or cabbage together in a pan. Drain, and mash with butter and salt and pepper. If you are feeling extravagant, add a little blob of cream.
When the duck is cooked, make sure you let it rest for about twenty minutes before you carve it.


#292 Isle of Man Salt Duck. I must admit, when the duck was taken out of pan to rest, it did not look that appetizing with its podgy fat and no hint of colour. I'm used to eating roast duck. However, when I cut inside, there was the most tender duck meat within. It was salty, but not overpoweringly. It also had very subtle flavour too, as did the onion sauce, which I expected to be terribly strong. Instead, it was light and very good for a spring or summer meal. The colcannon was a great accompaniment too. This kind of good, but bland food, really requires heavy seasoning, otherwise it is in danger of becoming tasteless pap. This was not tasteless pap however: 7/10.

Monday, May 9, 2011

#291 Burnt Cream or Crème Brulée

Often considered a French dessert, Crème Brulée was thought to have come out if the kitchens of Trinity College, Cambridge via the sister of a librarian there, others think from an Undergraduate from Aberdeenshire in the 1860s. When the student graduated, so did the pudding and it became a favourite of the college. This is all nonsense because a recipe can be found in The Experienced English Housekeeper by Elizabeth Raffauld which was published in 1769 (I have a facsimile of it). Grigson gives three recipes for it – the first, from the librarian who called it a Crème Brulée, the second and third – both dating earlier – called it Burnt Cream. Jane Grigson got a bee in her bonnet about whether the dessert had French or English origins. Where did Raffauld get her recipe from? It is a question that cannot answered, it seems, as the two nations' cuisines are overlapped and interwoven so much since the Norman conquest of 1066. She did find a sixteenth century English manuscript with a recipe for burnt cream though, which was written around the time that Charles II came back to England after returning from exile in France.

I did this pudding whilst I was in England to go after the roast pork. I'd been wanting to do it for a while, as it is a pud I really enjoy, but mainly I just wanted to get the blowtorch out and melt the sugar. I'd never done it and it has always looked such a satisfying thing to do. None of the receipts ask for a blowtorch, but rather a very hot grill or 'salamander', as overhead grills were called in days of yore.

There are three recipes given by Jane, I went with the first, which was also her favourite, from a 1909 book called The Ocklye Cookery Book by Eleanor L. Jenkinson:

Place the yolks of six eggs in a bowl and bring a pint of double cream to the boil and let it boil for a full half-minute. Quickly whisk the hot cream into the eggs and return the mixture to the pan. Cook on the very low heat until the cream thickens somewhat – it should coat the back of your wooden spoon. I then sweetened it with a little sugar and added some extra flavor with some orange-flower water (lifted from Raffauld's recipe). Don't cook for too long or on too high a heat, as the eggs will scramble. If you think the eggs have scrambled, pass the whole lot through a sieve. Pour the custard into a shallow dish and let it chill in the fridge for as long as possible – overnight, if possible. If not possible (as it wasn't for me), place it in the freezer as soon as it has cooled down to set. To burn the cream, scatter it with a thin, even layer of caster sugar and pop it under a very hot grill until it turn to a lovely melted caramel. Or use a blowtorch. Put it back in the fridge to harden.

For the sake of completion, here are the other two recipes:

From Domestic Cookery by a lady (Maria Rundell), 1848

'Boil a pint of cream with a stick of cinnamon, and some lemon peel; take it off the fire, and pour it very slowly into the yolks of four eggs, stirring until half cold; sweeten, and take out the spice, etc.; pour it into the dish; when cold, strew white powdered sugar over, and brown it with a salamander.'

From The Experienced English Housekeeper by Elizabeth Raffauld, 1769

'Boil a pint of cream with sugar, and a little lemon peel shred fine, then beat the yolks of six and whites of four eggs separately; when your cream is cooled, put in your eggs, with a spoonful of orange-flower water, and one of fine flour, set it over the fire, keep stirring it till it is thick, put it into a dish; when it is cold sift a quarter of a pound of sugar all over, hold a hot salamander over it till it is very brown, and looks like a glass plate put over your cream.'

#291 Burnt Cream or Crème Brulée. 'The best of all English puddings' says Griggers. Well I'm not sure of that, but it was pretty good. The cream tasted very light due to the heady perfume of the orange-flower water and the crackling caramel was satisfying to smash and delicious to eat. It wasn't quite as thick as I expected to be. We all dug in with spoons, not bothering with bowls. I expect several of us now have herpes. Overall, a pretty good recipe – I think I will try it again with the lemon and cinnamon flavourings from the 1848 recipe. 6.5/10

Saturday, May 7, 2011

#290 Roast Pork with Crackling and Baked Apples


Man's relationship with pigs goes back several thousand years. Acorn-eating wild boar were slowly tamed in European forests to become the slightly tamer proto-pig utilized by the Spanish, French and Greece. Swineherds had the unlucky job of attempting manage the unruly pigs. Modern pigs are not quite as wild as their forbearers, but do apparently revert to their feral behaviour quite readily. So beware.

Galen, the medical pioneer of the Roman era, enjoyed a bit of pork like his fellow Romans. What is odd is that he thought it tasted of human flesh. Whether this was a hunch or whether it was knowledge from experience, I do not know. He is correct though, the cannibals of the South Sea Islands, called the various explorers and pioneers they caught and ate longpigs due to their flavour.

The pig is famed for it versatility and pretty much all the animal can be used, and it is the pig that is the focal animal in Fergus Henderson's wonderful nose-to-tail restaurant, St John in London (check out the blog here). I've never managed to get there unfortunately, but one day I shall! For any nose-to-tail fans out there, the ultimate delicacy must be Pliny's personal favourite, the vulva of a sow who had aborted her first litter, according to Maguelonne Toussaint-Samat in her amazing book A History of Food.

This dish was cooked on my recent trip to England, where Hugh somehow managed to buy a massive shoulder of pork for £1.50. Absolute bargain. He's a good bargain-hunter; in fact, he's known for it! I pounced upon the opportunity to roast it the Grigson way which includes baked apples as well as a glaze to go over the crackling. I imagine a sweet glaze would go down well with Texans going by this sign I spotted at the rodeo:


It's worth mentioning that it is best to buy the largest joint you can afford, the meat will be much more moist and tender in a large joint than a small one. This particularly applies to pork that benefits from a good blast of heat and then a slower roast on a lower hear than say, beef.

As mentioned I used shoulder here, but you can use leg or loin. If the meat has a bone in it, ask the butcher to remove it but ask to keep it. Also ask him to score the rind, every centimetre or so. You can do it yourself with a razor-blade. Make sure that the rind is nice and dry and season the joint all over. You can, leave it overnight in the brine tub, but if you do this, you won't get the crackling. Seeing that the crackling is the best bit, I wouldn't recommend it. If you have bones, pop them in a saucepan with a chopped carrot, a peeled onion studded with three cloves and a bouquet garni. Cover with water and allow it to simmer for three or four hours. Strain and reduce to ¾ of a pint. If there was no bone, use some pork or vegetable stock and simmer for just an hour.

Heat the oven to 220°C (425°F) and rub the skin of the joint with some oil and sprinkle with some salt. Cook for 35 minutes to the pound (1 ¼ hours to the kilo). Place in the oven and turn the temperature down after 20 minutes to 160°C (325°F). An hour before the end of the cooking time, prepare the apples. You need one per person, and use Cox's Orange Pippins if in season. If not, use Braeburn or Mackintosh. Score a circle close to the tops of the apples, to prevent the skins bursting and nestle them around the joint. If you don't want baked apples make an apple sauce.

Next prepare the glaze. Melt a tablespoon of redcurrant jelly in a pan and mix in a tablespoon of French mustard as well as half a tablespoon each of cream and soft brown sugar. Paint the glaze all over the crackling in the final half hour of cooking.

When ready, remove the joint from the oven and let it rest for at least 20 minutes. While you are waiting, make the gravy. Melt an ounce of butter in a pan and when it goes a nutty brown colour, stir in a tablespoon of flour. Whisk in the stock and add any meat juices from the roasting pan.


Voila!

#290 Roast Pork with Crackling and Baked Apples. I have eaten roast pork many times, but never actually cooked, but I can honestly say that this was the best roast pork I've ever had from a domestic oven. It was so tender, it took no effort to slice and the glazed crackling was half crispy, half chewy and almost toffee-like. The baked apples were a revelation. An absolutely fantastic roast dinner! 9/10.

Thursday, May 5, 2011

#289 Quail

And the LORD spake unto Moses, saying,
I have heard the murmurings of the children of Israel: speak unto them, saying, At even ye shall eat flesh, and in the morning ye shall be filled with bread; and ye shall know that I am the LORD your God.
And it came to pass, that at even the quails came up, and covered the camp: and in the morning the dew lay round about the host.
Exodus 16:11-13

As you can see, eating quail has gone back a good few years. You don’t see them very much in the UK these days; I’ve perhaps seen them twice at Farmers’ Markets. The USA, however, is chock-full of tricky-to-find ingredients to help me with this blinking blog project.

Although classified as a game bird, quails are farmed these days as they’re not very common, and it is now illegal to kill them, so if you hear one chirping away in a nearby field, let it be.


People in the Middle Ages certainly did not let them be, because they loved them. Actually they ate everything it seems. Here’s a list I found of their favourite game: quail (natch), partridge, pheasant, hare, rabbit....ok thus far, all Grigson recipes, but then... rook, crow, raven, lark, sparrow, capercaillie, peacock, stork, heron, swan, crane and bittern. Phew! A certain Alfred Gottschalk says on the matter: ‘It is wonderful that the stomach of man can profit by all manner of birds, and yet there are some of them that even starving dogs would not eat.’ Quite.

Griggers doesn’t give that much detail on how to cook them, in fact this is the whole recipe: ‘...they can be browned in butter and braised with a little stock, port wine and orange peel.’

So that is exactly what I did. They were browned in a cast-iron casserole and covered in a quarter of a pint of chicken stock and a good slug of port, along with some salt and pepper and some pared orange peel and popped them in a 160°C (325°F) for 20 minutes. I then took them out to rest and used a beurre manie (i.e equal weights and butter and flour mashed together) to thicken it. I served it not with the usual game accoutrements (bread sauce, game chips etc), but mashed potatoes and some wilted spinach.


#289 Quail. One of the mildest of the game birds, pale-fleshed and light to eat. It’s difficult to keep these tiny moist so quick cooking is required. The port wine and orange gravy was delicious and didn’t overpower the birds. These smaller game are good, but I think I prefer the stronger birds like pheasant and pigeon. I did enjoy feeling all medieval having an entire animal sat on my plate, so just for that it was worth cooking them. 6.5/10.

Tuesday, April 19, 2011

#288 Leek Pie

I beseech you heartily, scurvy, lousy knave, at my desires, and my requests, and my petitions, to eat, look you, this leek: because, look you, you do not love it, nor your affections and your appetites and your digestions doo's not agree with it, I would desire you to eat it....if you can mock a leek, you can eat a leek.
William Shakespeare, Henry V
 I like to get a bit of Shakespeare in whenever I can.

There’ll be no mocking of leeks on this blog. They are one of my favourites, though I don’t really eat them that often. The main reason, I think, is that no matter how much I wash them before preparing them, there is always some grit – invisible to the naked eye – that ends up in the final dish. I’m always so thorough too. Hey-ho, a bit of dirt is fine. In fact there’s an old Yorkshire saying: tha’s got to eat a peck o’muck before you die. Indeed.

Here’s a pie that sounds great – leeks, cream and bacon in pastry. Nothing can be bad about this one, with or without grit.

I assumed that this recipe was a Welsh one, but no, variations of it are found across Britain and France. Grigson doesn’t say that much about it, other than in France onion and flour are added to the filling, so technically this is the French version, but let’s not split hairs.

To make the pie, you’ll need to buy or make some shortcrust or puff pastry. I made some shortcrust. You’ll need to make a shortcrust that uses 10 ounces of flour and five of fat; I did eight and four respectively and only just managed to get away with it.

To make the filling, chop and onion and cook it in an ounce of butter until soft and golden. Meanwhile, trim, wash and chop a pound of leeks. Slice the green part thinly, as it is quite tough and takes longer to cook than the white part. Add the leeks to the onions along with two ounces more of butter. Season with salt and pepper. It’s important to add the salt at this point as it draws the liquid from the leeks, concentrating their flavour.


When softened and mushy, turn off the heat and add four ounces of chopped back bacon. Now measure four ounces of double or clotted cream – weight, not volume – and beat in a teaspoon of flour. Pour this over the leeks and bacon and allow to cool.


Roll out two thirds of your pastry and line a nine inch tart tin. Add the filling and roll out a lid with the remaining pastry, using beaten egg as a glue. Crimp the edges and ‘decorate in restrained manner’. I just made some fluting around the edge. Brush with egg and make a hole in the centre so the steam can escape. Bake for 15 minutes at 220°C (425°F) or until the pastry is nice and brown, then turn the heat down to 180°C (350°F) for another twenty to thirty minutes.


#288 Leek Pie. What a great pie! The filling became a rich and delicious mush with subtle onion and leek flavour. The secret to this – as with so many of the best in English Food – is the that are just a few ingredients cooked slowly over a low heat with a good amount of seasoning. It was just as delicious cold as it was hot. One of the best recipes thus far I’d say. Go and cook it! 9.5/10.


Sunday, April 17, 2011

#287 Scotch Woodcock

Here’s a quickie that was a popular savoury in Victorian times in the same vein as Locket’s savoury and Gloucester ale and cheese. None of them are really eaten these days, though most of the time they are very tasty (though also very rich; no wonder everybody had gout). Although such savouries were served at the end of a meal in those days, it is is perfect for a first course or as a light lunch these days, I reckon.
It doesn’t contain any actual woodcock, of course, but is basically anchovies and eggs on toast – the fish and eggs being a substitute for the prized game bird. Just like how Welsh Rabbit is really cheese and bread instead of the delicious meaty mammal.
This recipe makes six woodcocks:
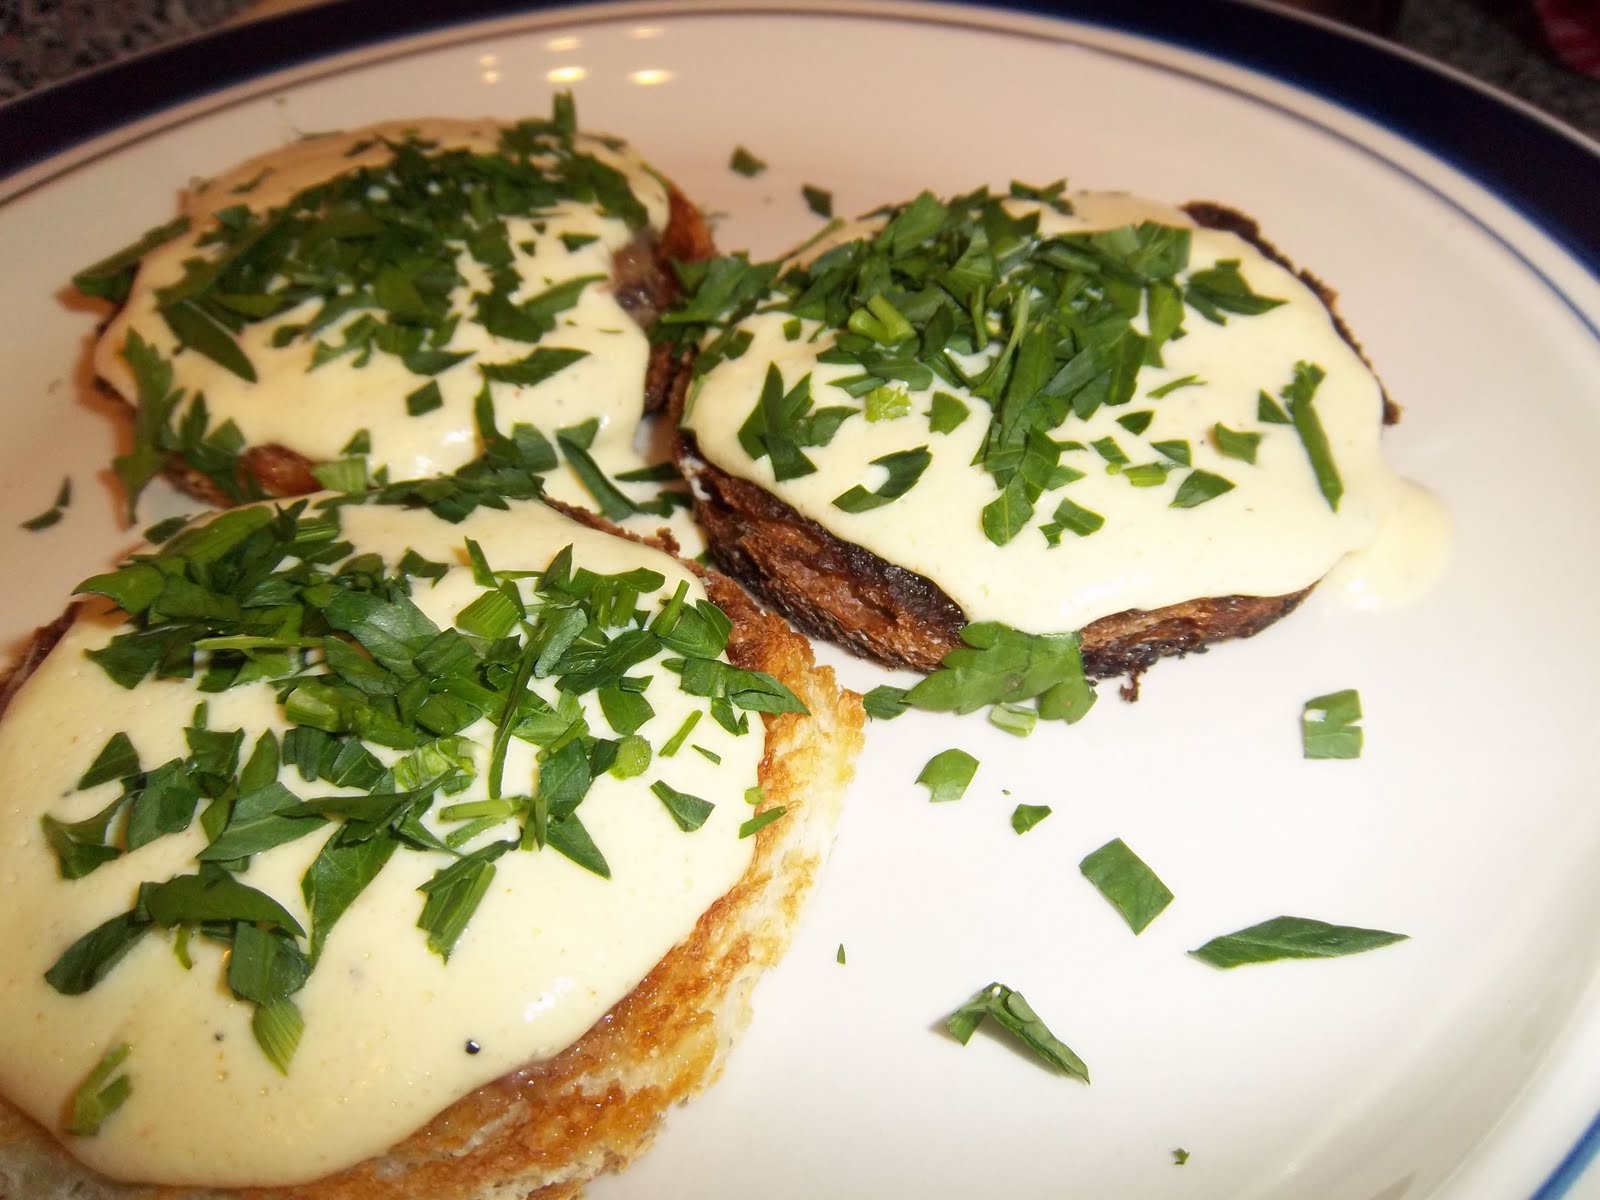
Start by draining a tin of anchovies before mashing them with two ounces of butter. Next, get the toast ready – cut circles out of six slices of bread and toast them on both sides. Spread with butter and then the anchovy mixture. Keep warm whilst you make the eggy sauce. In a saucepan, add two egg yolks to half a pint of whipping or double cream. Beat the yolks and add pepper a little salt and a good pinch of Cayenne. Stir over a moderate heat until the sauce thickens. Spoon over the anchovies, add a flourish of chopped parsley and serve it forth. If you don’t fancy making the thickened cream sauce, make some softly scrambled eggs made with a bit of cream instead.
#287 Scotch Woodcock. Previous anchovy-based recipes in this blog have ranged from the most delicious to the worst and most bizarre. This one however can join the ranks of the delicious. The intense saltiness of the anchovies was balanced very well with the bland creamy sauce. Very, very good. I ended up eating three and it gave me stomach ache. Hey-ho, you’ve to take the rough with the smooth in life aintcha? Tres bon, 8/10.

Tuesday, April 12, 2011

#286 Candied Peel

From the odds and sods part of the last chapter of the book this one. I’ve never been particularly moved to make candied peel because I usually bake cakes on a whim and don’t really consider thinking ahead and making the chopped peel required for fruit cakes et cetera. This has all changed now I am in the United States of America. If you buy candied fruit for your cakes here they will not only contain citrus peel but also invariably a good proportion of glace cherries and pineapple. Now don’t get all tetchy America; I’m not dissing your candied fruits. Sheesh! In fact I prefer your version, but it’s just not English now, is it? And that simply will not do for the purposes of my blog.
This recipe uses the peel of two grapefruit or one ‘large, fine’ pomelo (you can get these at Asian supermarkets pretty easily) or four oranges. Slash the skins and remove the peel, pith and all. I suppose it’s a good way of using up the peel of citrus fruits instead of just throwing them away. I suppose you can follow this recipe and candy pretty much anything you like. Lemons would work. Or citrus slices. I once saw loads of whole candied fruits like plums and peaches and things like that for sale in Harrods at extortionate prices.
Back in Tudor times, people went crazy for candied fruits and it is during these times when recipes for mince pies and Christmas pudding were borne. This was due to the sudden supply of sugar from sugar cane from the West Indies. A very popular dish at the time was sweet custard tart with candied fruits and candied fish! The fools. Plus, to have black teeth was very much the rage; this meant you could afford to plenty of sugar!
Once you have removed the peels, boil them, covered, for a good fifteen minutes. Drain them and repeat this process once, twice, or thrice again until the peel is tender and the bitterness is ‘at a palatable level’. Now drain them and let them cool.
 Now either leave them as they are or cut into strips. You can use the strips as an after dinner sweetmeat if you like. If so cut them into nice neat long rectangles if you want to do that. Dissolve ten ounces of white sugar in a quarter of a pint of water in a saucepan over a medium heat. Bring to the boil and add the peel. Boil steadily, stirring occasionally until all the syrup has been absorbed. This takes around half an hour.
Now drain the peel in a metal sieve and then leave to cool, spread out on kitchen paper.

Keep them in an airtight tub and chop whenever required for cakes. You can roll them in some more sugar or dip them in melted chocolate to serve with coffee if you like.
#286 Candied Peel. I quite enjoyed making these – quite a therapeutic process; just right for a Sunday afternoon activity. Easy too – I was expecting it to be tricky. I was imagining a spluttering tub of boiling sugar and third degree burns, but it was all quite tame. I haven’t used them for anything yet, but I did have a taste and they were very, very good. Very sweet of course, but still had lots of zesty zing left in there and a million miles away from the bought stuff. What shall I candy next? Suggestions below please! 8/10.

Wednesday, March 23, 2011

#285 Creamed Parsnips

Parsnips don’t seem to be that popular in America, at least compared to Britain. In the USA, carrots and sweet potatoes are much more favoured as a sweet-starchy vegetable. In Europe, parsnips have been cultivated since Roman times, and although in the UK, the wild parsnip is quite a common plant, it has rather pathetic roots,and isn’t worthwhile eating. The parsnips eaten in Britain are therefore not indigenous. They were probably brought over around AD55 during the Roman invasion. The Romans used parsnips in desserts because of their sweet and chestnutty flavour, weirdly, parsnips are used in a cake in English Food that is based upon the recipe for an American carrot cake. Ah, the circle of life.
The European wild parsnip

Creamed parsnips can be served alongside some roast meat, or on their own with toast or in pastry cases as a supper dish, says Griggers. I had them for supper.
Peel, top, tail and quarter a pound and-a-half of parsnips. Remove any woody parts, if the parsnips are large and cut them into batons. Plunge them into boiling, salted water and allow to cook until tender – between five and ten minutes, depending upon the size of you batons. Drain and return to the heat. Stir in a quarter of a pint of double cream (or half-and half double and single). Heat through, season with salt and pepper and stir in some finely chopped parsley. Serve hot.
#285 Creamed Parsnips. Ah the simple things are the best, innit? These were delicious and not at all heavy – the parsley lifted the whole thing, preventing the dish becoming sickly. The creamy sauce and the carby parsnips themselves made the supper feel quite substantial. A hidden, simple gem. 8/10.


Saturday, March 19, 2011

#284 Veal, Ham and Egg Pie

Okie dokie, so the last two posts have all been on the subject of raised pies. The first one explained how to bake and construct one, and the second explain how to make the jellied stock. Now it is time for an actual filling to complete the full recipe.
This is the first of several fillings for raised pies from the book, and I must admit that I have been putting off making one in case it was a disaster. In the end it was a delight to make.
I chose this recipe because it seemed the most basic, with the easiest ingredients to get hold of; the nearby Central Market sells a range of veal cuts, which are usually tricky to get hold of. Strangely enough, the tricky item to get hold of was the unsmoked and raw ham, gammon or bacon. I searched high and low for it, but to no avail. Luckily, I am now pretty good in the kitchen these days and knew I could cure my own ham overnight in the brine tub I now have sitting at the back of the fridge ready to leap into action whenever I need an emergency curing. I bought a bit of pork loin as it is the leanest cut.
So, to make the filling you will need to hard boil and shell four eggs. Whilst they are bubbling away, get the meats ready: cut up 1 ½ pounds of ‘pie veal’ (I took this to mean cuts for casserole, like shoulder) along with 12 ounces of unsmoked bacon, ham or gammon. You want chunks around a centimetre in size. Add the grated rind of a lemon, a tablespoon of chopped fresh parsley, a teaspoon of dried thyme. Mix these together well with a decent  amount of seasoning. Pack half of the mixture in the pastry-lined mould. Place the eggs inside and then the remaining filling (see the raised pie post for pics of this). Then bake as described in the raised pie post.

#284 Veal, Ham and Egg Pie. Whew! This pie pretty much took me a whole Sunday to make. It was worth it though. The filling was wonderfully light and fresh tasting due to the herbs and lemon and the meat flavour was quite subtle, the whole thing kept moist by the jellied stock. The pastry was crisp and tasty too – hot water pastry is so easy, I can’t believe I put it off for so long. I brought it into work for people to try and it seemed to go down pretty well and I’ve been eating it through the week. There’s one slice left know, and I already miss it. Cannot wait to try the next one. I think i have found my calling as an artisan pie-maker extraordinaire! An excellent pie! 8.5/10 (I’m not marking it higher, in case the others are even more delicious!).

Friday, March 18, 2011

#283 Jellied Stock

If you are going to attempt to make a raised pie, then you need to make a jellied stock. The jelly in these pies is either loved or hated. Many people can’t stomach the thought of savoury jelly I think and either have to pick it out or avoid eating these delicious pies altogether. The jellied stock is very important though. The meat inside is cooked for a long time and can dry out a little – some water escapes through the hole in the top and some is absorbed by the pastry. The stock soaks into the meat, making it nice and juicy again and it fills any gaps made by the shrinking contents.
So here’s the recipe. You could, of course, just use some stock and gelatine, but that would be cheating!
First you need some bones that will release alot of gelatine, so use either two pig’s trotters or a veal knuckle – ask the butcher to cut them into several pieces for you. To these, add any bones you may have left over when you prepared the fillings. You’ll also need a sliced large carrot, a medium onion studded with three cloves, a bouquet garni and twelve black peppercorns. Place all of these in a big stockpot.

From this...

Now add four to five pints of water, bring to the boil, skim off any scum and cover and simmer for three to four hours.

...to this...
Strain the stock through some muslin into a clean pan and boil it down until it is a concentrated ¾ of a pint. Season it with some salt and more pepper if required. The stock is now ready to be funnelled or poured into the raised pie (see here for instructions).

...to this!

#283 Jellied Stock. I won’t write a review for this as it’s not a dish in itself, but I will say that it was a very satisfying process; condensing that big set of ingredients into the viscous well-flavoured stock. Made me feel like a real baker.

Thursday, March 17, 2011

#282 Raised Pies

Is there anyone who doesn't like a pie made with hot-water pastry? Everyone, I say, from the Mayor of Melton Mowbray to, er, Sweeney Todd. Oh, except for vegetarians. They’re so quintessentially English and I’ve not seen anything remotely close here in Texas. I must admit I’ve been putting off making these pies – I’d never made one before and I knew that it would take a lot of time, and presumably, effort. However, I felt I was ready – and so I should be because there are several to do in this book so I need the practice. Hopefully I’ll get it right first time.
So, for those of you not in the know, a raised pie is a pie made from pastry using boiling water and lard, unlike shortcrust pastry that is kept as cold as possible. Hot water pastry achieves a putty-like consistency that allows the pie mould or tin to be moulded and raised up the sides of the tin, rather than rolled. The hot water makes the pastry very absorbent too; you need this as the filling cooks and releases juices. Normal pastry that contains butter would just turn into a sloppy mess. Raised pies became crazily over-the-top in the seventeenth and eighteenth centuries. Elizabeth Raffald’s receipt for a Yorkshire Goose Pie gives the following instructions:
Take a large fat goose, split it down the back and take all the bones out. Bone a turkey and two ducks the same way, season them very well with pepper and salt, with six woodcocks
You don’t get pies like that in Yorkshire nowadays, I can tell you. Imagine the meat sweats you’d get from a slice of that!
The raised pie hasn’t quite fallen out of favour in Britain these days – I’m sure Melton Mowbray pork pies are as popular as ever, but that’s all you generally see now. The book proffers more, and I shall be adding them as I go. The basics are: Pork Pie; Veal, Ham and Egg Pie; Raised Mutton Pies; and Game, Chicken or Rabbit Pie. They all have the same basic parts: the pastry, the jellied stock and the filling itself.
It all seems a bit complicated, but it’s not really. In this post I’ll deal with the construction and baking of the pie. The jellied stock and the fillings can have their own posts (these are coming in the next day or two).
Begin by making the hot water pastry. Bring a third of a pint of water and six ounces of lard to the boil. In the meantime, weigh out a pound of flour and place in a bowl with half a teaspoon of salt. When boiling, tip the water and fat into the flour and mix quickly – electric beaters are the best for this, but don’t use a high speed as the pastry won’t bind properly. To enrich this pastry add an egg, or a tablespoon of icing sugar. Cover the dough and leave until it cools enough to handle, but don't let it cool down completely. Take three-quarters of the pastry and put it in a six or seven inch cake tin with removable base. You can buy fancy hinged raised pie moulds – they are quite expensive though, but they are beautiful (see this link). Quickly, but carefully, mould the pie by gently pushing the pastry up the sides of the mould or tin until it overlaps the lip, making sure there are no holes or tears. If it just flops down, then it is too hot. Wait five minutes and try again.

If you want to make small pies, you can mould the pastry around the outside of a wide rolling pin or a jam jar. This method is required for the mutton pies. This is alot trickier apparently. So unless you can avoid it, do the big pie.
Now you can start on the jellied stock and prepare your pie filling. Pack the filling well into the raised crust.

...if it mounds up above the rim, so much the better.

Roll out a lid with the remaining pastry and fix in place with a little beaten egg, making a hole in the centre for steam to escape. Decorate the pie with leaves and roses using pastry trimmings. It’s strange that savoury pies have the ornate decorations in England and that the sweet ones are left plain. I don’t know why this is. Anyway.... Brush the lid with more egg (don’t throw unused egg away, you’ll need it later).

Bake in the oven for half an hour at 200°C (400°F) to colour the top, and then lower the temperature to 160°C (325°F) for two hours for large pies and just one hour for small pies – you need this time for the meat to cook and become tender. Watch the pie doesn’t brown too much though – if it needs a little protection, cover with some brown or wax paper. Remove it from the oven and leave it to cool for thirty minutes before removing it from its mould very carefully. Brush the sides with beaten egg and return it to the oven for a final half an hour to brown and crisp up.

Whilst the pie cooked, the meat shrank, so the gaps need filling with the jelled stock. This can be carefully poured through the hole in the lid, or better using a small funnel. Let the pie cool and eat the next day. The pie will keep for days wrapped in wax paper and kept somewhere cool.
Phew!
#282 Raised Pies. It won’t write a review for this recipe – I’ll save that for the fillings. However, it is worth saying that although making a pie like this is no mean feat, it is worth having a go. I had such fun pottering about the kitchen making my first riased pie (the Veal, Ham and Egg Pie). But then, I am a great big geek. Anyway, hopefully I have inspired you to give it a go, if not at least appreciate how much effort goes into these beautiful and delicious artisan pies.

Sunday, March 13, 2011

#281 Scallops with White Wine and Jerusalem Artichokes

If I am going anywhere that is likely to have lots of nice food, I take my copy of now dog-eared English Food along with me in case there is something I don’t expect to see but is required for a recipe. Central Market, the place where I seem to get most of my ingredients from here in Houston, almost always has something unexpected I can use. Today was no exception: I was shopping for some pie ingredients, but also came across some nice Jerusalem artichokes. A quick flick through the book and I found this recipe that combines them with one of my favorite items of seafood, scallops. I was in the mood for treating myself, so I thought this would be a great late lunch dish prefect for these warm days in Houston.
This recipe isn’t one of Jane Grigson’s herself, but from one of her contemporaries and friends Joyce Molyneux, who owned a restaurant called The Carved Angel in Dartmouth. Ms Molyneux adapted the recipe from a recipe she saw for scallop and Jerusalem soup in a book called Four Seasons Cookery Book by a certain Margaret Costa. It’s funny how recipes get changed and passed around, constantly evolving into different dishes.
To make a lunch for four you will need eight large scallops. Remove the corals (should they still be on) and reserve them and cut each scallop into five or six discs. Now trim about twelve ounces of Jerusalem artichokes and cut them into thin matchsticks (keeping trimmings for soup, Griggers says). Fry them gently in two ounces of butter and when nearly tender – about ten minutes – add the scallop discs and four tablespoons of dry white wine. Season with a little salt and pepper. After a minute, add the corals and cook for another two minutes. Don’t overcook – they will become like rubber. Arrange the scallops and artichokes on a warm plate and concentrate any remaining juices, seasoning with more salt and pepper if you like plus some lemon juice. Finally, stir in some chopped parsley and pour over the scallops. I served them with some nice buttered sourdough bread, thinly sliced.
#281 Scallops with White Wine and Jerusalem Artichokes. I loved this. One of the best recipes I’ve done in a while. The earthy artichokes worked so well with the sweet scallops, plus the wine, lemon and parsley really made the whole thing wonderfully fresh tasting. Mopping up the sauce with the bread was the perfect finish. Excellent. 9.5/10.

Friday, March 11, 2011

#280 Welsh Cinnamon Cake

Known as Teisen Sinamon in Welsh, this is a mysterious cake. Griggers doesn’t really give any history behind it in the book. She says that the recipe is by Mrs Bobby Freeman (who has written a book of Welsh cakes and buns). She also says that it’s bit of a pity that chefs don’t make traditional dishes enough in their restaurants anymore. I did find after a little research that is a Victorian recipe – thanks Victorian Recipes of Wales teatowel! I’m not actually sure if it is a cake – it’s more like a giant biscuit with some meringue on top. Quite American really.
I made this cake on request for my mate Chandra’s birthday the other day. I think it went down quite well at work.
Cream four ounces each of butter and sugar in a mixing bowl and then beat in two egg yolks (reserve the whites!). Sift eight ounces of plain flour, a rounded teaspoon of cinnamon and half a teaspoon of baking powder and mix them in stages into the creamed butter and sugar. Knead this mixture together and roll it out to line a nine inch flan tin with a removable base. Actually rolling it out is a total pain in the arse because it breaks up very easily. Instead spread it out over the base of the tin using your knuckles, pushing the dough up the edges and make it neat using the edge of a measuring cup. Bake for 20 minutes at 200°C (that’s 400°F). Remove from the tin and cool on a wire rack. Heat some apricot jam with a little water to make a glaze and paint it thinly over the cake. Remember those two egg whites? Add another one and whisk until the stiff-peak stage. Then add three tablespoons of caster sugar and whisk again until the meringue becomes silky and creamy. Pile into the centre of the cake and make decorative swirls and spikes. Bake again at 180°C (350°C) until the meringue is a nice golden brown – about 10 or 15 minutes. Take out and cool on the rack again.
#280 Welsh Cinnamon Cake. Is it a cake? Is it a cookie? We just don’t know. It was very nice though – plenty of warm cinnamon spice. It was a bit stodgy too, but in a good way. I’m not sure about the meringue topping though. Not a bad one, by any means. 6.5/10.

Tuesday, March 8, 2011

#279 Apple Sauce II

I still had sausages left over from Harrison Hog Farm – I ate half of them with Crempog Las and wanted to the give the rest the Grigson treatment. I could have gone with toad-in-the-hole or something, but I’d done that already. Luckily I spotted this apple sauce recipe which can be served with sausages (as well as pork, salt pork, duck and goose). What made me want to do this recipe is that allows one use sausage as the meat in a Sunday dinner rather than a roast meat which can be a pain to do if there is a lot going on in the day. So it’s good old sausage and mash for dinner.
The recipe asks for Cox’s Orange Pippins, Laxtons or James Grieve apples. These are not available in America (as far as I know), and so for any Northern Americans amongst us (and I know there are several), go for Mackintosh apples instead – they have the tart mealiness of a Cox’s Pippin.
There are several apple sauce recipes in English Food and I have now hit a bit of a brick wall – the remaining recipes all use Bramley’s seedlings which can’t be found in the USA, and I haven’t been able to find an appropriate alternative. If anyone has any suggestions, let me know!
Roughly chop 12 ounces of apples – no need to peel or core them. Add them to a saucepan along with a strip of lemon peel and 3 ounces of water (by weight!). Cover and simmer until soft. Pass them through a sieve into a bowl, forcing the apple flesh through to produce a smooth puree. Return to the saucepan and simmer quite briskly until the puree thickens and starts to spit and bubble a little. Stir in an ounce of butter and season with pepper and a little salt, but only if the butter was unsalted.

#279 Apple Sauce II. A slightly strange sauce this. I liked the fact it was unsweetened – bought apple sauces are far too sweet I think and they don’t always do a good job of cutting through the rich, greasy meat it’s usually served with. The butter enriched it but didn't make the whole thing sickly like I expected. A good sauce, but nothing to write home home about! 5.5/10.

Monday, March 7, 2011

#278 Crempog Las

Well Shrove Tuesday is almost here, so I thought I’d provide a pancake recipe from English Food. This one is perhaps a more alternative recipe as it is most definitely savoury rather than sweet, and best served up with sausages, bacon and eggs as a breakfast dish rather than for a Pancake Day evening pig-out. In America, people seem to be having much more fun with their Mardi Gras celebrations...
The Welsh seem much more adept at pancakes than the English and I suppose that’s why there are so many Welsh recipes in the Pancakes and Griddle Cakes section of the Teatime chapter of the book. If they weren’t counted, there would be slim pickings. Crempog Las, by the way, translates as green pancakes in Welsh (check out this site for more information on this dish and other Welsh dishes). I didn’t have high hopes as there has been a bad run of recipes from this section…
The other reason why I wanted to cook these pancakes is that I found a pack of sausages that I bought from Harrison Hog Farms. They have a stall at the Rice University Farmers’ Market and breed pigs that look suspiciously like Gloucester Old Spots; a fine old English breed, so I thought they can’t be bad. Naturally, I put in them in the freezer and promptly forgot about them. Even though I have only been in my Texan apartment for five months, I have managed to almost fill my freezer with bits that I see in shops and left overs like wine, egg whites, breadcrumbs and what-not that I expect one day will come in useful. I decided that it needs emptying. It is for the same reason that later on this week I will be doing oxtail soup.
Anyways, I have wittered on far too much:
Using a whisk, mix together four ounces of plain flour, a large egg, a dessertspoon of finely chopped parsley, a heaped teaspoon of finely chopped shallot and enough milk to make a thick batter. Season with salt and pepper. Fry the pancakes in some oil or grease  over a moderately-high heat until golden brown – two or three minutes a side should do it. That’s it. Serve with butter or as part of a fried breakfast.
#278 Crempog Las. These were delicious! A subtle savouriness from the slightly sweet-acrid shallot and the grassy freshness of parsley made them very morish. I am definitely adding these to my breakfast arsenal. Give them a try, they are so very, very easy. 7.5/10.

Sunday, February 27, 2011

#277 Hazelnut Stuffing for Poultry and Lamb

I mentioned in the last post that people don’t make their own gravy anymore, well the same goes for stuffing. I have to admit, I don’t often make stuffing for roast poultry normally, though I have for the blog before. Every time I do, it comes out delicious and is always better than even the poshest pre-made supermarket pap. So I thought I was well overdue making some (which I think is also called dressing in the USA, non..?).
This one, I thought looked interesting – with its earthy hazelnuts and piquant-sweet preserved ginger; just the thing for a climate that is never really wintry. After all, the main reason that I haven’t cooked more food like this in Houston is because it is so bloody hot all the time and I don’t necessarily want roast meats. Anyways, this one seemed good and light and reasonably summery.
Griggers makes a point of highlighting the quality of hazelnut required for the recipe – pre-roasted and chopped hazelnuts are fine, she says, but you really want some slow roasted whole Italian ones from Avellino near Vesuvius, where they have been grown since Roman times. I’ll just pop over and fetch some. I couldn’t get those of course, but I did get Roman ones, so that pretty good I reckon, bearing in mind where I am!

Julian of Norwich with Hazelnut. For some reason.
If you want to be truly old-school, you can use cobnuts, which can still be found growing around the southern counties of England, in particular Kent. FYI: cobnuts were the original nut used in the game of conkers before the horse chestnut was introduced into Britain.
Stuffing is the easiest thing in the world to make. To start chop a large onions and soften it in two ounces of butter – keep it on a medium heat with a lid to prevent to browning. Once cooked, add the following ingredients in the following order: four ounces of fresh breadcrumbs; two ounces of toasted, chopped hazelnuts; four knobs of preserved ginger*, chopped; grated rind of half a lemon; the juice of a lemon; one large beaten egg; salt and pepper; and two tablespoons of chopped parsley. Now you can use the stuffing for whatever you like. If this is for turkey, you may need to double, or even treble the amounts given here.
If you are using it to stuff a bird, make sure you weigh it after it has been stuffed so you can include the extra weight in the cooking time.  Also, it is best to stuff the neck end rather than the cavity, as the stuffing doesn’t go stodgy; just loosen the skin and stuff it in, securing it all by folding the neck skin under the bird. Any left can go into the cavity – but only pack it loosely.


*If you can’t get preserved ginger then use ginger preserve (i.e. ginger jam), or miss it out entirely and replace it with the chopped liver of the bird(s) and a heaped teaspoon of thyme.
#277 Hazelnut Stuffing for Poultry and Lamb. Absolutely delicious and definitely the best stuffing so far in the book! It was sweet and earthy and the nuts had gone wonderfully soft and translucent, giving out their flavours into the rest of the mixture. The lemon and ginger lifted it all very well and stopped it from being too heavy. This is going into my everyday repertoire. 9/10.