It does use some nice wintertime ingredients: hazelnuts are usually in good supply along with the brazils, walnuts and almonds; there’s the fine herb chervil which I have tried and failed to grow myself. They’re a hardy plant and good for growing in autumn and winter. Unless it is me attempting cultivation. It is obviously in season now as I have seen them twice for sale over the last months or so.
Saturday, January 21, 2012
#327 Turkey and Hazelnut Soup
It does use some nice wintertime ingredients: hazelnuts are usually in good supply along with the brazils, walnuts and almonds; there’s the fine herb chervil which I have tried and failed to grow myself. They’re a hardy plant and good for growing in autumn and winter. Unless it is me attempting cultivation. It is obviously in season now as I have seen them twice for sale over the last months or so.
Saturday, December 24, 2011
#322 To Make a Goose Pye
Great big pies like this were often given as gifts at Christmas time. The many meats were covered in a nice thick crust, not just because it tastes good, but also to help preserve and protect them – after all, these pyes were travelling by horse and carriage! These days, it is best as ‘a splendid centre-piece for a party’. Indeed, that the was the reason why I made it – my bosses Dave and Joan were hosting a Christmas party, and my fellow workmates are quite enthusiastic about the blog so I knew they’d all be up for this pye. Personally, I have always wanted to do this recipe – these crazy recipes are the reason why I love doing this blog. It comes from Hannah Glasse’s classic 1774 book Art of Cookery:
Half a peck of flour will make the walls of a goose pie...Raise your crust just big enough to hold a large goose; first have a pickled dried tongue boiled tender enough to peel, cut off the root, bone a goose and a large fowl; take half a quarter of an ounce of mace beat fine, a large teaspoon of beaten pepper, three teaspoons of salt; mix all together, season your goose and fowl with it, then lay the fowl in the goose, and the tongue in the fowl, and the goose in the same form as if whole. Put half a pound of butter on the top, and lay on the lid. This pie is delicious, either hot or cold, and will keep a great while. A slice of this pie cut down across makes a pretty little side-dish for supper.
Griggers kindly converts all the quantities into modern-day terms – less flour can be used (unless you are having it sent somewhere by horse!) and birds are rather larger nowadays. Good old Griggers. It is certainly the most extravagant recipe I have done thus far and possibly the most complicated; the recipe itself is quite straight-forward, but it requires a boned goose and a boned chicken, something that I had to do myself. Would the effort be worth it..?
There is a certain amount of preparation required if you are to do this from scratch. The first thing is to pickle an ox tongue in brine (see here for instructions) and cook it (see the recipe here for making pressed tongue; there is no need to press it). You need 2 ½ pounds of cooked tongue, so start with one that weighs at least 3 pounds. Next is the birds: you need a 10 pound goose and a 5 pound chicken. If you can, ask the butcher to bone them for you, if that is not possible, try doing it yourself – all you need is a bit of patience and some good sharp knives. I followed the method on this website for boning a chicken, but had to change the instructions somewhat for the goose as it is much trickier than a little chicken. So here’s a little digression as I give you my version...
Boning a bird is actually quite easy – what you are essentially doing is undressing the meat from the skeleton of the fowl. As you can imagine, it is a little gory.
First thing to do is to cut off the wing-tips and then to peel the skin away from the shoulders and cut through the joints.
Next, pull on the wing bone and scrape the meat from it as you go, turning the wing inside out. Repeat with the other shoulder joint.
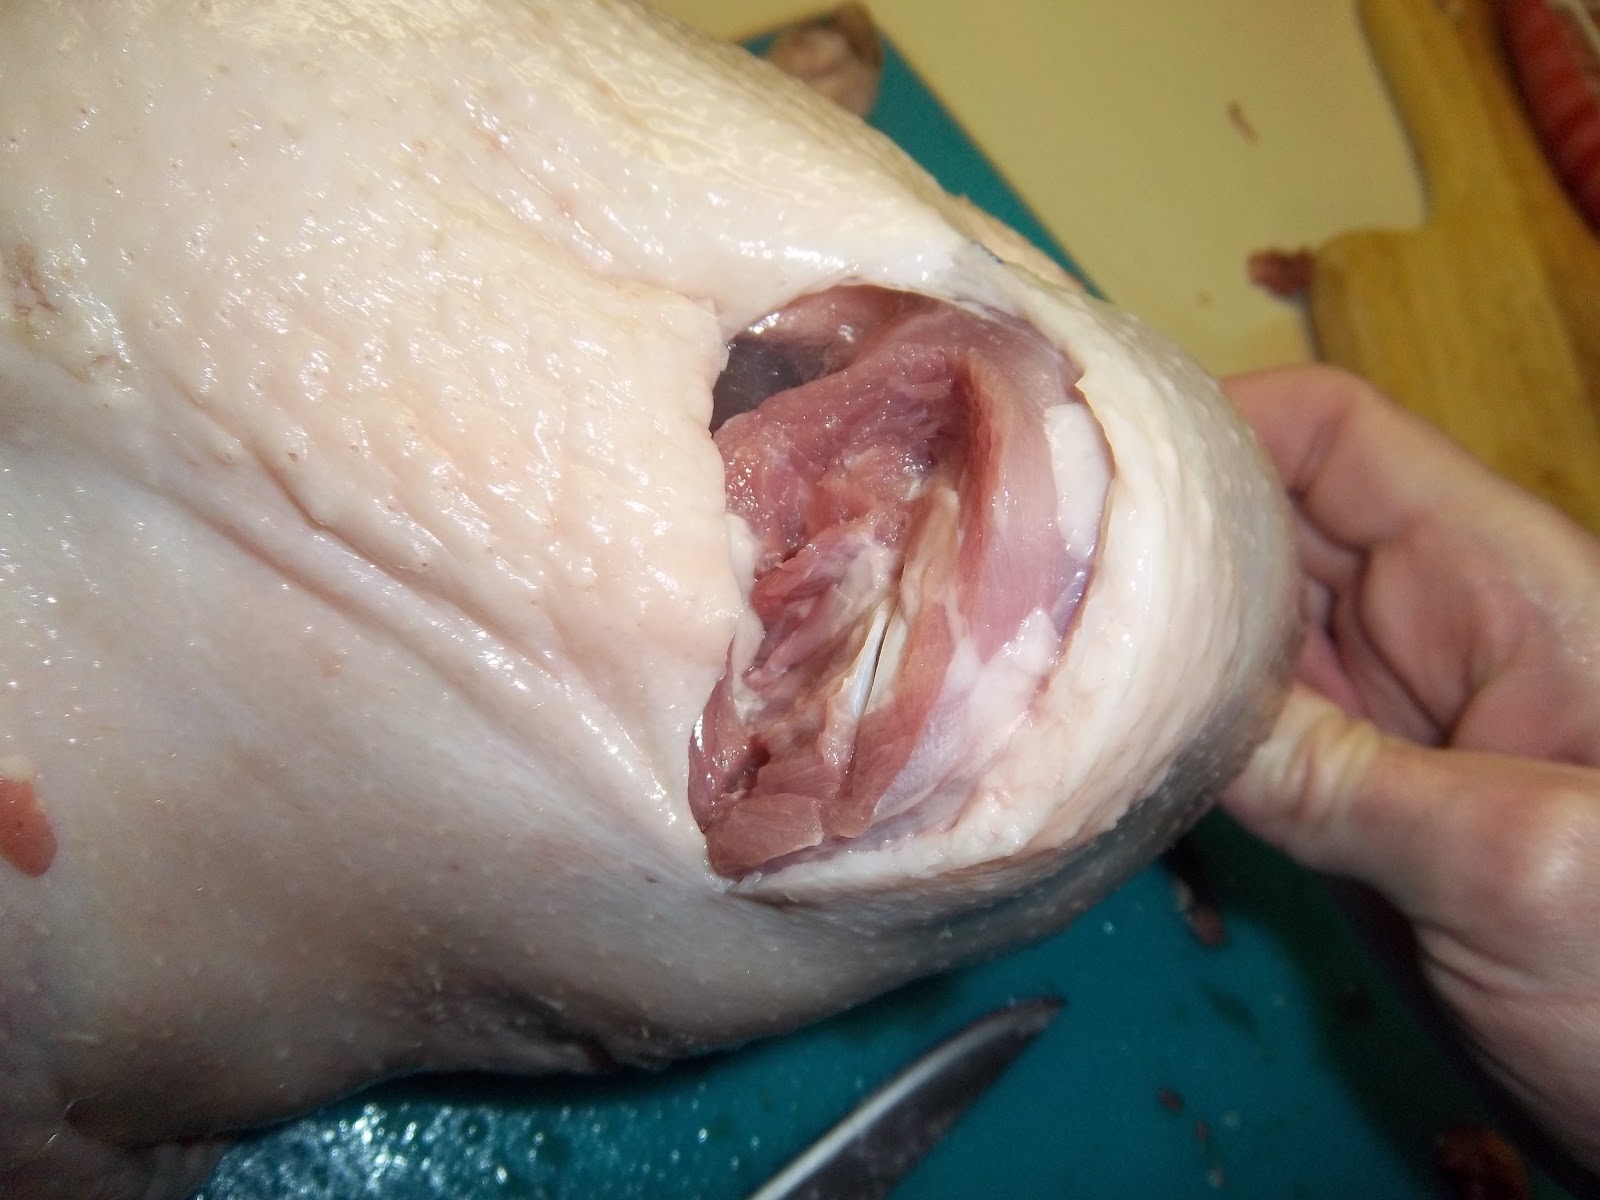
Now remove the wishbone from the top of the breasts and start cutting the meat away from the ribcage, pulling the meat back. Keep doing this around the whole of the body. When you are about half-way down, sit the bird up and let the meat hang down by its own weight. When you get to the hips, you need to pop the femur out of its socket, then continue until the whole of the carcass is removed from the bird. You can then remove the leg bones in very much the same way as the shoulder and wing bones. Getting through that socket is very tricky with a large bird like a goose because of the large joint and large amount of fat surrounding it – to get around this, I flexed the knee joint and cut through that so I could scrape the meat off the bones from the direction of the knee.
When the leg bones have been removed, all you have to do is turn the bird outside in. Don’t forget to turn the bones, trimmings and giblets into stock.
So, you have your tongue and you have your birds, next you need to get working on the hot-water crust. You need to make a crust using 3 pounds of flour. I’ve blogged about hot-water pastry before, so follow this link. I made it in 3 batches – the first I used to form the base. I made lots of smallish pastry balls to cover the inside of a glass roaster measuring about 12” x 9” x 2” and pressed them out to make a single layer that overlapped the edges of it.
Next, mix together ¼ ounce of ground mace, 2 heaped teaspoons of ground black pepper and 5 rounded teaspoons of sea salt.
Now place the tongue in the chicken and rub in around a third of the spice mix into the chicken...
before gingerly wrapping fitting inside the goose. Place the goose in the pie and rub in the remainder of the spice and salt mix.
Lastly, smear two ounces of butter over the top of the goose.
Now roll out the rest of the pastry and cover the top of the pie, using some water as a glue. It is quite tricky to pick up such a large piece of pastry without it breaking – so use a rolling-pin and wrap it around it and unfurl it atop the pie. Crimp the edges, trim and decorate with the trimmings. Brush with beaten egg and make a central hole for the steam to escape.
Place it on a baking tray and bake the pie at 220°C (425°F) for 20 minutes and then turn the heat down to 180°C (350°F) and bake for another 2 hours. If the pie is browning too much, cover it with brown paper to protect it. If the pie bubbles ferociously, then turn down the heat again to 140-150°C (275-300°F). Loads of fat comes out the central hole, hence the precaution of the baking tray. I had to empty it twice during the whole process. I reserved it for making roast potatoes in the future, of course.
If you are wanting to serve it cold, then like most cold pies, it is best to make it a couple of days in advance so that the flavours can develop.
#322 To Make a Goose Pye. What a spectacle this pye was – especially when sliced up. I expected it to be rather macabre, but it wasn’t. It was indeed a ‘pretty little side dish’. The meat inside was wonderfully moist and a good jelly had formed inside without the need for jellied stock. Some people were a little suspicious of the tongue, but everyone seemed to like it. The only problem – though others disagreed – was that it was rather under-seasoned for me; with an extra 50 per cent salt, pepper and mace, this very, very good pye would have been excellent. 8.5/10
Monday, November 14, 2011
#314 Boiled Turkey with Celery Sauce
Thanksgiving Day is just around the corner here in the USA so I thought the next two posts will have a Thanksgiving theme. I knew that there would be little chance of replacing the turkey on the day, but I wondered if cooking it in a different way might be possible. Plus if anyone reads this near Christmas, they might want to give it a go.
This is a classic: ‘A favourite dish of the Victorians and quite rightly so, because it is delicious – mild without insipidity’, says Jane. In fact, that is all she says on the dish. Boiling turkey was a popular way of cooking fowl, perhaps because it takes little time to cook; two hours maximum for a 15 pound turkey. I hoped it would make it deliciously juicy and tender. I did worry, however, that boiling it would sap what little flavour a turkey has even at the best of times.
The earliest recipe for boiled turkey with celery sauce I could find goes back to 1777 – it appears in a book by Charlotte Mason called The Lady’s Assistant to Regulating and Supplying her Table… (the full title is much longer than this!). More familiar contemporaries, Hannah Glasse and Elizabeth Raffald, also give recipes. Here’s a top-tip from Raffald:
“Let your turkey have no meat the day before you kill it. When you are going to kill it give it a spoonful of alegar [malt vinegar], it will make it white and eat tender.”
So there you go.
I didn’t expect the recipe to go back much further as the turkey, being from the New World, would have entered Europe until the late fifteenth century at the earliest. However, I was wrong – it was celery that was the latecomer in England, appearing in the middle of the seventeenth century. Strangely, the earliest recorded mention of the turkey in Europe was in an account book from 1385; Phillippe of Burgundy enjoyed a roast turkey in one of his luxurious banquets. How on earth did it get there, I wonder?
Why we call these birds turkeys has always troubled me – after all they aren’t from Turkey. Nobody is sure, but it seems that the first English turkeys were brought to Britain by travelling merchants that had been given the gift of the birds after eating some whilst on a business trip to Turkey. So somehow the birds came from the New World, via Turkey, all before the New World was even discovered!
So if you fancy having a change from roast turkey, but want to keep to tradition give this recipe go:
The first thing you need to do is to get hold of a pot large enough to fit your turkey breast-side down. You need a turkey that weighs up to 15 pounds. Once your turkey is nestled in its pot, tuck in the following vegetables and aromatics: 4 sliced, medium carrots; a sliced, peeled turnip; a sliced stick of celery; three whole, unpeeled onions, each studded with three cloves; 15 crushed peppercorns; two bay leaves; 4 thyme sprigs; a bunch of parsley stalks; and a heaped tablespoon of salt. Then, add enough cold water to only just cover the legs.
Saturday, June 11, 2011
#298 Pulled and Devilled Turkey, Chicken or Pheasant
The turkey, chicken or pheasant is both pulled and devilled because the brown meat (i.e. leg and thigh) and the white meat (i.e. breast) are treated differently, with the brown getting a spicy marinade – the devil! – and the while meat being pulled apart into thready pieces the "thickness of a large quill" and cooked in a buttery-cream sauce presumably to temper the spicy devilled meat. Though this is an old recipe, I could find no information on it, though the inclusion of the mango chutney and the Cayenne pepper suggests an early Indian influence on English cuisine.
Although there is the big #300 coming up, this recipe marks the mid-way point through the leviathan of a chapter – the meat section. I've not done half as many of the strange or tricky ones that I have intended, but expect some when I move to St Louis later this month. I won't have much of an option soon, as that's all will be left to do!
Here's what you do:
First prepare the appropriate fowl for the dish:
Roast turkey, you'll need a leg (slightly underdone, if possible) and around a pound of cooked breast meat.
For chicken, you can use a boiled or roasted one, but try and undercook it. I did roast chicken and just missed off the final twenty minutes of cooking time.
For pheasants, a brace of either stewed or roasted ones will suffice!
Take the brown meat from the leg bones, keeping the pieces quite large and make some good, deep slashes in the meat. Now make a devil sauce by mixing together a rounded tablespoon each of Dijon mustard and mango chutney, a tablespoon of Worcester sauce or half a teaspoon of anchovy essence (I went with the former), a quarter teaspoon of Cayenne pepper, a little salt and two tablespoons of corn – or some other flavourless – oil. Pour this over the brown meat, making sure you work it into the slashes you made. The easiest way is to do all of this inside one of those zip-lock freezer bags. Let the meat marinade for a few hours, though I wouldn't leave the chicken more than two as it is the most bland of the three birds here; pheasant or turkey could easily take four or five though, I reckon. Now lay the devilled meat on a baking tray and grill it under a high heat until it turns a delicious dark brown colour. Keep it warm.
Whilst the devil does its work, get on with the pulled part of the dish. Pull the breast meat apart with your fingers and set aside. For the pulled sauce, melt seven ounces of butter in a wide pan and then add half a pint of double cream. Bring to a boil and let it bubble for a couple of minutes before adding the breast meat plus any bits of jelly, then season with salt, pepper and lemon juice. Lastly, stir in some chopped parsley. Spoon into the centre of a serving dish or plate and place the devilled bits around the outside.
Eat with bread and a salad.
#298 Pulled and Devilled Turkey, Chicken or Pheasant. Griggers really built this one up, and I have to say that it more than lived up to expectations. The devilled bits were deliciously spicy and salty and were perfectly complimented by the creamy and surprisingly light pulled sauce. Definitely the best recipe from the Poultry section so far, but then what can be bad about spice, butter and cream? That's the three major food groups, isn't it? I can't wait for Christmas now, I'm going to get an extra-large turkey just so this can be made the next day, and it is infinitely better than turkey a sandwich, that's for sure! 9.5/10.
Monday, January 17, 2011
Happy (Belated) New Year!
Most of the recipes were ones I had done before – it is great that so many have become part of
my repertoire. Christmas dinner with the family was a meat-overload, doing Roast Turkey, Boned Rolled Sirloin AND Roast Pheasant. This is the first year since I started the blog that I haven’t done the Christmas Cake. I missed it. Next year, I shall!
Anyways, I’m back in Houston now and have made the resolution that I shall do my very best to keep blogging regularly – it’s been up and down since the move. My SMART target is to do one a week now I am back. That’s an achievable target, innit?
Saturday, November 27, 2010
#262 Chestnuts as a Vegetable
Friday, March 5, 2010
#228 Spiced Salt Beef
You need to start by buying your beef – a piece of silverside between 2 and 6 pounds should be okay. Place the beef in a clean tub (that comes with a clean lid!) and rub 3 ounces of dark brown sugar into it. Fit the lid on tightly and leave in a cool place for 2 days. Next, make the spiced salt mixture using 4 ounces of good sea salt, a heaped teaspoon of saltpetre and an ounce each of crushed peppercorns, allspice berries and juniper berries. Use a spice grinder or coffee grinder to break up the spices if you have one, otherwise use your pestle and mortar and some elbow grease. Now rub this mixture into the beef well and leave for another nine days, rubbing the salt mix and any juices into the beef and turning it every day.
To cook the beef, rinse off any spice by running it briefly under the tap. Place the beef in a tight-fitting lid with around 8-10 fluid ounces of water. Pack shredded suet over the top surface of the beef to hep keep in the moisture as it cooks. To doubly ensure that minimal moisture is lost from the beef cover the pot with a double layer of foil before putting the lid on. Place in an oven heated to 140⁰C for 45 minutes per pound, or 50 minutes per pound if the joint is small. Remove from the oven and allow to cool for three hours before removing the lid and foil. Wrap the joint is some greaseproof paper and place a three pound weight on it and allow it press overnight. Slice it thinly and use it for sandwiches et cetera.
#228 Spiced Salt Beef. This may have been the best cured meat thus far; it was certainly the easiest. The spice-salt mixture comes across very obviously but does not take over. It keeps well in the fridge for a while if wrapped in clingfilm too. Try it in a sandwich with cucumber and horseradish sauce. Great stuff. 8.5/10.
Monday, December 21, 2009
#206 Orange Mincemeat Part 2; #211 Cumberland Rum Sauce
First up, the mincemeat. I have given the recipe for them already and also reported upon the Griggers way of making mince pies properly, which is how I make them now. All I have to do is give them a mark.
#206 Orange Mincemeat. Well, the orange mincemeat is ten times better than any bought stuff, the three types of booze must help. The mincemeat is not as orangey as I’d hoped, but still great. The best thing is, and it’s the same with the other recipe, is that it is not too sweet. Have a go, but the better is the Beeton. 6.5/10.
I have already made a brandy butter and it was good, but I thought I’d try this Cumberland rum butter – I had higher hopes for it as my favourite spirit is dark rum. Have a go at this, or the other brandy butter recipe, it’s very easy, just requiring some simple creaming and mixing.
Cream eight ounces of unsalted butter until pale and fluffy. Beat in six ounces of soft brown sugar, three tablespoons of rum and a good grate of nutmeg. That is it! Serve on mince pies or Christmas pudding, or even with warm oatcakes, which is how the folk of Cumberland served it, apparently.
#211 Cumberland Rum Butter. Really delicious. Not too sweet and sickly, the dark rum and dark sugar give it a bitter-sweet note. Great stuff. 7/10.
Sunday, November 22, 2009
#206 Orange Mincemeat
If you want to make your own mincemeat, make sure that you make it at least two weeks before you want to use it as it needs that long to mature. If you’ve never made it, have a go, it really is very easy – there is no cooking involved, just some chopping, measuring and mixing.
This recipe makes absolutely loads of mincemeat – around ten jars – so reduce the quantities if you want to make less. To make it, simply mix together the following ingredients together in the following order in a huge bowl:
8 ounces of candied orange and lemon peel
2 pounds of apples, peeled, cored and chopped
One pound of chopped suet (use fresh, if you can)
One pounds each of raisins, currants and sultanas
One pound of dark brown sugar
1 freshly grated nutmeg
4 ounces of blanched slivered almonds
The juice and grated rind of two oranges
Four tablespoons of brandy
Eight tablespoons of orange liqueur (e.g. Cointreau)
Pack the mincemeat well into sterilised jars and leave for at least two weeks. (FYI to sterilise the jars, put them along with their lids on trays in an oven set to 110⁰C for 25 minutes, pot whilst they are still warm.)
Tuesday, November 10, 2009
Christmas is Becoming...

Tuesday, May 26, 2009
#149 Broad Town Mince Pie
Make a quantity of shortcrust pastry using 8 ounces of flour and both lard and butter (I am now a total covert to adding lard to pastry…unless I’m cooking for vegetarians that is). Line an 8 inch tart tin with two-thirds of it and spread the half-jar of mincemeat evenly over the pastry base. Now make the almond layer – mix together 4 ounces each of caster sugar and ground almonds, then an ounce of melted butter, 2 egg yolks (one if large) and 2 tablespoons of cream. Dollop and spread the mixture best you can and cover the pie with the remaining pastry, brush with egg white and sprinkle with sugar. Bake for 15 minutes at 220°C, then turn the oven down and bake for a further 30 minutes at 180-190°C. Serve it hot or warm with cream – or, if it is near Christmastime, then add some brandy butter.
#149 Broad Town Mince Pie – 6/10. Good, but rich, pudding that is useful for doing away with the endings of a jar of mincemeat. I actually found I enjoyed it a lot more once cold the next day. Not a bad dessert, but it didn’t get any juices flowing; and it’s certainly not better than a good old mince pie.
Wednesday, December 31, 2008
#88 Christmas Pudding: Part 2, #102 Brandy Butter
To make brandy butter (or hard sauce, as it used to be called), cream 4 ounces of butter, when you've done that, beat in 4 ounces of icing sugar, 1 1/2 tablespoons of brandy, some freshly grated nutmeg and a squeeze of lemon juice, if you like. Allow to set in the fridge. Make this in advance - I made it a few days before the big day.
#88 Richard Boston's Guinness Christmas Pudding - 3.5/10. Pretty disappointing this pudding was. It tasted really good, but was extremely stodgy and soft. I think I'll use half breadcrumbs, half flour next time.
#102 Brandy Butter - 6.5/10. Nice, but very rich indeed. Think I prefer good old custard.
Tuesday, December 30, 2008
#101 Parsley and Lemon Stuffing
Begin by cutting the crusts off a large white loaf of bread and blitz it in a food processor until it becomes crumbs. Lay the crumbs on a large baking tray and allow them to dry out in a cool oven – you don’t want them to brown so 80ºC will be enough. Weight out 8 ounces of the crumbs (freeze the rest) and put in a large bowl and mix in the zest of two lemons and the juice of one, a bunch of chopped parsley, a teaspoon of chopped thyme, a teaspoon of dried marjoram, 8 ounces of creamed butter, 3 eggs and a good seasoning. Mix the ingredients with your hands and stuff the main cavity of the turkey with it. You probably won’t use it all, so freeze the rest in balls so you can put them in the cavity of chickens for your Sunday Roast.
#101 Parsley and Lemon Stuffing – 7/10. A nice fresh and light tasting stuffing. I reckon it’ll go better with chicken than with turkey.
#100 Roast Turkey
The first thing to do is to remove the giblets and stuff the bird. You can stuff the cavity or the neck end, it doesn’t really matter. Next, calculate the cooking time of the turkey: 30 minutes per kilo if it’s below 7 kilos (15 lbs). If you are cooking a monster, add an extra 20 minutes per kilo after that. You must include the weight of any stuffing you’ve used too. Put the turkey on its side on a rack in a roasting pan and smear it all over with 6 ounces of slightly salted butter. Cover with a double layer of foil and cook at 190ºC for the appropriate time. Just under halfway through the cooking time, turn the bird onto its other side, and then in the final half an hour, put it on its back and remove the foil so it can brown nicely. Season with salt and pepper. Baste it a few times, if you like. Allow to sit for at least 20 minutes before you carve it. In fact, we left it for about an hour and it was still juicy and hot, so don’t feel you have to rush or anything. Skim off the fat from the juices in the pan, then make your gravy by boiling up the juices with a quarter of a pint of dry white wine and thicken with flour or gravy browning. Add enough hot vegetable stock to achieve the right thickness.
#100 Roast Turkey - 9.5/10. I love Christmas dinner, so I’m really glad that I did the turkey for the 100th recipe. This is a foolproof methods for doing your Christmas/Thanksgiving bird; succulent, tasty, not in the slightest dry. Bloody marvellous.
Monday, December 29, 2008
A Christmas Nosh Up
Saturday, December 20, 2008
#99 Baked Carp
Serves at least 6…
Choose a carp weighing around 3 pounds and ask the fishmonger to scale, gut and clean the fish* (and cut the head off, if you’re squeamish about these things). When you get home wash the carp in 6 tablespoons of vinegar dissolved in 4 pints of water. (Not sure why, may be to get rid of the slime – several freshwater fish produce slime). Whilst it’s draining, select a baking dish that will fit the fish snugly (to achieve this I unfortunately had to cut the head off). Smear the bottom of the dish with 6 ounces of butter and lay the fish on top. Season with salt and pepper, and add a quarter teaspoon each of mace, nutmeg and cloves, a bouquet garni (I did parsley stalks, bay and some pared lemon rind), a generous teaspoon of anchovy sauce and a chopped onion. Top up with dry white wine, so that the carp is almost covered. Cover with foil and bake at 200ºC for 40 to 50 minutes.
When done, put it on a serving dish and strain the cooking juices into a heavy based pan. Bring to the boil and allow to reduce slightly. Mash 2 ounces of butter with a tablespoon of flour and drop knobs of the mixture gradually whilst whisking to thicken. Once thickened, season with salt and pepper, add a squeeze of lemon juice and a little cream. Pour some sauce over the carp, and serve the rest in a sauceboat.
FYI: If you're concerned as the potential damage to stocks of carp by this sudden increase of demand, the common carp is either farmed these days, or lakes are stocked with them. In fact they are considered a bit of an evasive species, so tuck in ladies and gents.
#99 Baked Carp – 7.5/10. I really liked this dish; I wasn’t really sure what to expect, I’ve not really eaten freshwater fish much (except for salmon, which I don’t like). I was very surprised at it’s subtly fishy and oddly gamey flavour. The very English mace-laced sauce was lovely. If you get the chance to lay your hands on one over Christmas, get it bought, though I’m not sure I’d replace my turkey with it!
*If you are lucky enough to have a fish with roe inside, ask the fishmonger to keep it aside, as you can make a stuffing with it – I didn’t get any, but it’s the look of the draw. Obviously I can’t comment on it’s loveliness, but have a go and tell me about it: Start by softening a small onion in butter. Meanwhile, mix an ounce of breadcrumbs with some milk to turn them to a paste. Mix the onions in along with the chopped roe, a tablespoon of chopped green herbs, a teaspoon of grated lemon rind and ½ teaspoon of anchovy essence. Season with salt, pepper and lemon juice. Stuff the fish with the mixture and sew it up.
Monday, December 1, 2008
#94 'To Make Mince Pies'
Jane Grigson gives instructions on how to make them. She says to use shortcrust pastry rather than puff pastry (unless you are eating them warm). I made pastry with half butter, half lard; I prefer it as it is more crisp and 'short'. Whichever way you do it remember the flour:fat ratio is 2:1. Roll out pastry thinly and cut circles out with a scone-cutter to line small tart tins. Place a small teaspoon inside – don’t overdo it though, the fresh suet expands. Seal the top with another circle of pastry, gluing it on with some egg white. Make a cross in the middle and sprinkle with sugar. Bake for 20 minutes at 220ºC. Serve warm or cold.
#94 ‘To Make Mince Pies’ – 8/10. I really like the mincemeat. The meat is totally undetectable; but it, the fresh suet and the grated apple make the resulting pie-innards succulent and tasty, it’s not overly sweet either, which is good because you can eat more of them! Good old Mrs Beeton, where would we be without her! It’s been a while since I’ve had homemade mince pie and it brought back a lot of memories for me making them with my Mum. I am definitely getting in the Christmas spirit!
Friday, October 31, 2008
#88 Richard Boston's Guinness Christmas Pudding
The recipe is not unlike that for the mincemeat; it’s just a question of mixing everything together in the order given. Use your hands to mix it up – it’s a lot easier than using a wooden spoon. Also, you can’t over-stir it, so get everyone in to give it mix. If I remember rightly, to get good luck, thirteen people have to mix it clockwise with their spoon and make a wish before you steam it (if you believe in that sort of stuff). Dry ingredients first: 10 ounces of fresh breadcrumbs, 8 of soft brown sugar, 8 of currants, 10 of chopped raisins, 8 of sultanas, 2 of dried mixed peel, 10 of shredded suet (the packet kind!), plus ½ teaspoon of salt and a teaspoon of mixed spice. Now mix in the grated zest of a lemon, a dessertspoon of lemon juice, 2 large, beaten eggs, ¼ pint of milk and a 300ml bottle of Guinness. Divide this between your pudding basins, that have been well-buttered (I’ve bought some of those plastic ones with proper lids so you don’t to bother with foil tops covered with tea towels, etc.). Add a sixpence if you want. Now for the first steaming…If you can fit them in one, then steam for 7 ½ hours – yes you heard me – SEVEN-AND-A-HALF!! If not, a bit of guess-work is required – did the 2 pint ones for four hours, and the 1 pint for three. Don’t know if it’s worked, we will just have to find out on Christmas Day! To store them, either keep them covered in a cool place or freeze them.
Before steaming.
Yes I know they look bad in this state,
but they looked like proper puds when I'd done cooking 'em.
FYI: like mincemeat, the Christmas Pud was created as way of preserving meat, and the earliest recipe goes back to 1420, but it wasn't until the Victorians turned it into a proper dessert, did it become the familiar round shape topped with brandt butter, holly and flaming brandy. The stirring and steaming, traditionally occurred on 'Stir-Up Sunday', which was the first Sunday of Advent.
BTW in case you were wondering, Richard Boston was a food writer for The Guardian newspaper.Thursday, October 30, 2008
#87 Mrs Beeton's Traditional Mincemeat
The amounts are quite big in the recipe, so I’m giving you what I did which is half of Good Lady Beeton’s instructions:
Mix together 8 ounces of seedless raisins, 12 ounces of currants, 6 ounces of minced, lean rump steak, 12 ounces of fresh, chopped suet, 8 ounces of dark brown sugar, 1 ½ ounces of dried mixed peel, ¼ grated nutmeg, 12 ounces of apples that have been peeled, cored, and grated and the zest and juice of half a lemon. When all has been incorporated, mix in 2 ½ fluid ounces of brandy. Spoon the mincemeat into sterilized jars. (To sterilise jars, place jars and lids in oven set to 110°C for 35 minutes). This recipe made enough for four big jars. Leave for at least two weeks…
FYI: Mincemeat recipes go back as far as the Fifteenth Century, and pretty much any meat was used for mincemeat - Sixteenth Century recipes use heart or mutton and bone marrow instead of suet. It's probably one of the few surviving Elizabethan dishes still made today.
…to be continued.