Tuesday, November 26, 2013

#387 Pheasant Braised with Celery


The great thing about celery is that it is two vegetables and one spice all in one.
The large familiar swollen stems are actually greatly enlarged leaf stalks and make up most of the plant visible above the soil. The celery we know and love was selectively bred in 14th century Italy from the wild plant that is “rank, coarse, and…poisonous” according to the celery expert Theophilus Roessle. It is these stalks that join onions and carrots to produce the trinity of stock vegetables – indeed it is for stock, or for salads, that celery is commonly used, but it does make a great vegetable on its own. It was very popular to serve celery sauces with poultry, or served covered in a cream sauce with pheasant, which is what we have here for this recipe.
In Good Things, Jane Grigson gives us two valuable pieces of advice: firstly, that celery is a seasonal vegetable that is at its best from November and December. We have lost this seasonality and it is a shame, I expect few of us have eaten prime celery improved by the ‘first frost’. The second piece of advice is how to eat the vegetable raw; once you have procured your first-frosted celery, you should trim it and spread down the curved length of the stem good butter. Next, sprinkle with sea salt. “Avoid embellishments”, she says “a good way to start a meal.”
It is a myth that celery is calorie negative: a stick may only contain 10 calories, but it takes only 2 or 3 calories to chew, digest and process it. It is very low in calories, of course, and can help you lose weight, though "It's more of a gateway to cream cheese or peanut butter," says the nutritionist David Grotto. Indeed. In this case, it’s a gateway to bacon, port and two kinds of cream.
I plucked and drew my own pheasant, that way I could use its giblets for the sauce. For some reason, I decided that I should leave the feet on.
Start off by browning a pheasant in 3 ounces of butter along with a chopped onion in a frying pan. Place the pheasant breast side down with the onions in a casserole dish. Cut three strips of unsmoked bacon (aka green bacon) into thin strips and fry that in the pan briefly. Deglaze the pan with ¼ pint of port and a batch of giblet stock. See the now positively ancient post #122 Roast Pheasant for instructions on how to make some. Pour the stock, port and bacon into the casserole dish, cover tightly with a double layer of foil. Bake in the oven for 30 minutes at 180⁰C. At this point the legs of my pheasant stuck right out all flexed. At least there would be good handles when it came to the drumsticks.
Meanwhile, wash and slice a whole head of celery and when the 30 minutes is up, turn the bird the right way up and place celery around, under and within it. Season well with salt and pepper. Pop the foil lid back and give it another 30 minutes.
Remove the bird and place on a warmed serving plate, arranging the celery and bacon around it. Strain the cooking liquor into a small sauce pan. Whisk together a quarter-pint each of single cream and double cream along with a large egg yolk. Add this to the saucepan and stir with a wooden spoon over a low heat until it thickens slightly. Taste and check for seasoning and add a good squeeze of lemon juice. Lastly, scatter over some chopped parsley and serve with the sauce in a sauceboat.
#387 Pheasant Braised with Celery. This was a great recipe that was not anywhere near as rich as I expected it to be. The port wine cream sauce was so very tasty and complemented the still slightly crisp celery perfectly. It’s worth mentioning that you should use a nice deep-green organic head of celery – and not the intensively grown stuff you get at the supermarket. Hunt out a local supplier. The pheasant itself was nicely-flavoured, but a little on the dry-side. An hour’s cooking was too much for the tiny white lady pheasant I had procured from my butcher. Luckily, plenty of creamy sauce covered a multitude of sins and it didn’t spoil this first-class recipe. I didn't cover the claws though. 8/10.

Friday, November 15, 2013

#386 Herrings in Oatmeal


Herrings and oatmeal used to be staple foods in the North of England and Scotland, where the ‘silver darlings’ were plentiful and oats were pretty much the only cereal crop that could be grown in those inhospitable climes of The North. They were particularly enjoyed at breakfast. We don’t seem to eat fish at breakfasttime anymore, except for the rare kipper or a bit of smoked salmon stirred through scrambled egg, if we’re feeling posh.
Also, you don’t see recipes for this dish in older cookbooks, I assume it is because it’s so straightforward and was so commonplace that writing it down was simply not required. I cannot even find the phrase “herrings in oatmeal” before the 20th Century! More modern books include them of course, even if it just to remind us of the foods our forefathers ate.
Herring in general are quite ignored, I think, though their relative the mackerel is increasing in popularity. It’s strange that in the middle of the last century they were over-fished. It’s a shame they’ve fallen out of favour, as they are very nutritious and very cheap.
It is herring spawning season right now – they are bright-eyed, plump and have massive creamy roes in them, so if you want to try them, now is the right time
I confess, I have never eaten herrings in oatmeal, but I love herrings and I love oatmeal, so they couldn’t be bad.
This recipe is for six, but it is easy to see how it can be scaled up or down:

First of all, you need six fine herring. Ask the fishmonger to open the herring from the back as though they were kippers. Ask him to save the roes (they’re not required for the recipe but they should always be saved).
At home, season the fish and them press them into some medium or fine oatmeal that has been scattered over a plate; about 3 ounces should do it. Fry the herrings in butter until they are lovely and golden-brown. Do them in batches if need be, keeping the cooked ones warm in the oven on a bed of kitchen paper to keep them crisp. Serve with lemon wedges.

Jane tells us the best way to serve these is with simple boiled potatoes and bacon. I had the spuds, but swapped the bacon for a salad! Traditionally fatty bacon would be crisped and fried, and the herring would then be cooked in the bacon fat; next time (and there will be a next time) I’ll do the bacon thing.
#386 Herrings in Oatmeal. Well I have said it many times, but I’m going to say it again, the simple ones are the best. These were delicious, forgotten gems. The chewy oatmeal really complimented the mild herring perfectly. This sort of food has fallen so out of our collective consciousness that you just do not see it anywhere. I might be my new favourite thing. When my little restaurant opens, herrings in oatmeal will certainly be on the menu. 9/10.


Friday, November 8, 2013

#385 Apricot and Pineapple Jam

A recipe from the Preserves part of the final chapter of the book and a recipe that I have been putting off for a good while because it seemed like the most pointless preserve. The two main ingredients, you see, are tinned pineapples and dried apricots WHICH ARE ALREADY PRESERVED! What is the point of that!?

Jane tells us that her mother made this jam during the war, but lost the recipe, but then a stroke of luck; someone sent her a recipe, decades later. And here it is below. I suppose it makes a little bit of sense jazzing up the pineapple and apricots into a jam for high tea at a time of rationing.
The recipe uses not the dried apricots you typically find with the dried fruit in the supermarket, but the kind you find dried whole and rock-hard, with their stones inside. These are readily available at your local Asian grocers.
To begin, you need to soak a pound of the dried apricots in 2 ½ pints of cold water overnight. Take out the stones and crack them open to find the almond-scented kernels within. I find the best way to do this job is to put a dozen or so of the stones in a freezer bag and then swiftly crack them with a hammer. The bag stops the stones from flying everywhere, and a short swift crack with a hammer ensures that – in the main – the stones remain whole.
Put the soaking water along with the apricot flesh in a simmer gently for 30 minutes. Whilst they cook, drain a 12 ounce (375g) tin of pineapple, reserving the juice. Chop the pineapple quite small. Add the juice, the pineapple and kernels to the pan along with 3 pounds of sugar (granulated will do fine) and 4 ounces of blanched, slivered almonds. Bring to a rolling boil until setting point is reached using a sugar thermometer (104⁰C) or by the wrinkle test on a cold saucer.
Let the jam sit for 10 minutes before potting into hot, sterilised jars.
#385 Apricot and Pineapple Jam. This is a great-looking and great-tasting jam. It looks like bejewelled honey with those almonds and kernels floating in there. It doesn’t taste as sweet as I thought it would, and is delicious on toast or in jam tarts. It seems that, although the ingredients did not need further preservation, a jam was created that was greater than the sum of their parts. All art is useless, as Oscar Wilde said. Very good: 8/10.
 

Sunday, October 20, 2013

#384 Quick, Foolproof Puff or Flaky Pastry

Fool-proof? I’ll be the judge of that, Ms Grigson.

This is a recipe I have been putting off for ages; I have become pretty good at shortcrust pastries as well as hot-water pastry, but the rigmarole and potential disaster of a flaky pastry has always filled me with an inner dread. However, now that I am a half a fully-fledged patissier, and chock-full of confidence, I thought now is the time to give it a go.

I really should have looked at the recipe a little closer, because it is actually a rough-puff pastry as opposed to the true pâte feuilletée that can be made up of up to 1500 layers of pastry and fat. I was a little disappointed that it wasn’t the proper stuff, but then one shouldn’t run before one can walk, so perhaps a rough puff would be a happy stepping stone that will one day lead to the dizzying heights of the full puff.

This recipe was devised by, and then given to Jane Grigson, pastry chef Nicholas Malgieri who then worked ‘at Peter Frump’s famous New York cookery school’, and has now created an empire of his own. Like all rough puff pastes, it is best used for tarts, feuilletées or patisserie such as the good-old custard slice. To avoid bitter disappointment, don’t go trying to use them for something that requires a high rise, like a vol-au-vent (does anyone actually eat those anymore…?).

My good friend Charlotte came over to give me a hand, should I need it, though really I think she came to eat the dessert it would be used to make, which is fair enough. She did take some great photos for me though, so cheers Char.

It is important to buy good quality butter when making puff pastes, so don’t go using Tesco Value, instead go for a nice French or Danish one. Jane prefers French, I’d just say go for the best you can afford. This method satisfyingly uses a whole 250g block of butter, which is 8 ½ ounces in old money, which explains the seemingly strange weights used:

Start by cutting up 8 ½ ounces of unsalted butter into cubes, then sieve 8 ½ ounces of strong flour into a bowl. Rub in one ounce of the butter into flour. Tip in the rest of the butter and ‘work lightly’. I took this to mean to make sure each cube is separate and squashed flat, ready for easier rolling later.

In a measuring jug, dissolve half a teaspoon of salt in 2 teaspoons of lemon juice, then top up to 4 fluid ounces with ice-cold water. Tip it in and quickly bring it all together; ‘it will look appalling, a raggy mess’, says Jane, and so it did.

Flour your work surface and manhandle your pastry lump into an approximate 4-by-8 inch rectangle. Flour the top generously and roll out to a 9-by-18 inch rectangle, using more flour to prevent sticking. Now do the first folds: fold the short ends into the centre, then fold the whole thing in half so that it looks like a book. Turn the ‘spine’ one quarter turn to the left, roll out again, and make the very same folds. Turn, roll and fold one more time. If at any point the butter gets too warm and soft, pop it in the fridge to firm up.

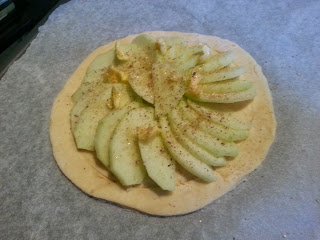
Chill for an hour (or freeze it) and it is ready to use. I used mine to make a couple of things. First was a nice crisp apple tart, glazed with brown sugar and apricot jam, and second was a nice pile of Eccles cakes. Lovely.
#384 Quick, Foolproof Puff or Flaky Pastry. Well, I have to say it was quick, and it was fool-proof. In fact, aside for the rolling out that required some degree of precision, I would say it is easier than a shortcrust for a beginner: rubbing in is minimal, it won’t be too dry and it won’t be over-worked. Why did I put this off for so long? It has already become part of my regular repertoire and I shall be using it in the amuse bouche for my next pop up restaurant in November. Great stuff, delicious, crisp and rich 9.5/10.
 

Monday, September 16, 2013

#383 Spiced Redcurrant Jelly


Redcurrant jelly is such an English sundry. Delicious with roast lamb, an essential ingredient in #45 Cumberland Sauce and venison sauce, and a great addition to a ham glaze.

A couple of things are interesting here: first the spice, and second the addition of vinegar. Jane likes adding tart vinegars to here sweet preserves that are used in savoury dishes. It was a revelation when I first came across it, making #367 Hot Red Pepper Jelly, which I was so impressed by I’ve been making it for the market stall.

In the past it has been difficult to get hold of redcurrants in grocers and supermarkets, but this year they seem to have been everywhere. However, I was prompted to make this jelly when I spied a heavily-laden redcurrant bush nestled among a load of 5-foot high weeds in an unruly corner of a vacant plot next to my allotment. How there was so many with all that competition from the weeds I do not know. Naturally, I had forgotten my phone, so I couldn’t photo it. I picked just a fraction of what is asked for in the recipe, but it is very straight-forward to scale down (or up).
Pick over 3 pounds of redcurrants, no need to remove stalks and leaves, and pour into a preserving pan, large saucepan or stockpot along with 1 ½ pints of water, 3 cloves and a teaspoon of ground cinnamon. Turn up the heat and bring to simmering pot and allow it cook until the currants have softened enough to burst open. Strain through a scalded jelly bag and allow it to slowly drip through into a clean bowl overnight.
Next day, pour the strained spiced juice into a clean pan with 3 pounds of granulated sugar and 8 ounces of malt vinegar. Put on a medium heat and stir until the sugar has dissolved, then turn up the heat and allow the jelly to boil for around 10 to 15 minutes before testing for a set. To do this put a few drops on a cold saucer and allow it to cool. Push the jelly with your finger, if it wrinkles, it has set, if not, boil for a further 10 minutes and check again. Alternatively, you can use a jam thermometer – a temperature of 105⁰C is the magic number.
Don't worry about the scum, it's easily got rid of
Let the jelly cool for 10 minutes and remove the scum either with a spoon or by beating in a small knob of butter until the froth dissipates. Pot into sterilised jars.
#383 Spiced Redcurrant Jelly. This is very good indeed. It has a pleasantly sweet and sour tang and is the most beautiful ruby colour; nothing like the bought stuff at all. I used it to accompany some lamb chops one day, and used it to make some lamb gravy on another. The sad thing is that now I have to until next summer to make some more! 8.5/10

Monday, September 2, 2013

#382 Laverbread as a Sauce


The third in a laverbread trilogy… the first post #352 Laverbread and Bacon tells you a little more about the mysterious iodine-tanged, deep-green gelatinous goo. Thanks to Jane Grigson it is goo I have grown to enjoy very much, and something I would never have tried had I not undertaken this project. Whenever I visit Wales I always come back with a tub of the stuff. Cheers Griggers!

This is a very quick and easy recipe that cleverly uses the flavour of orange to cut through and temper the very rich seaweed. It goes with roast lamb, ‘especially roast lamb and new potatoes’. It also goes with most fish; in Wales it is often eaten with cockles. Jane says that a hotelier friend of hers served it with lobster and it was ‘a most successful combination’.
Heat up 8 ounces of laverbread with the grated zest and juice of an orange, then season with lemon juice, salt and pepper. That’s it!

#382 Laverbread as a Sauce. This was a delicious sauce that was much lighter and more accessible than the sauce in #353 Roast Rack of Lamb with Laverbread, which was not for the faint-hearted. Lovely and light, I give it 7.5/10.

Tuesday, August 6, 2013

#381 Baked Gooseberry Pudding


I don’t know; you wait four years for a gooseberry recipe and then two come along at once. This year’s season for all soft fruits seems to be never ending, so there might be a third one yet…

The gooseberry is a strange fruit, isn’t it? It’s as lovely and tart as rhubarb, and yet very few people eat it, and it is seldom ever seen at all in countries like the USA or France. It is certainly a very British fruit. Jane Grigson points out in her Fruit Book, that the French don’t even have a name for it, or rather, a name that distinguishes it from a redcurrant. What is really interesting is that neither do we! You see, the goose- part of gooseberry has nothing to do with geese, because it comes from the French groseille, which means red currant, and that ultimately comes from the Frankish word krûsil, meaning crisp berry. Don’t say I don’t never teach you nuffink.

This is a straight-forward pudding indeed. It is a ‘good homely pudding to make when gooseberries first come in’, says Jane.

Start off by melting together 2 ounces of butter and 4 tablespoons of soft dark brown sugar in the bottom of a flameproof soufflé dish – if you don’t have one (as I don’t), melt them in a pan and then tip the resulting mixture into the dish.
Arrange enough topped-and-tailed gooseberries in the dish then spread over one batch of pound cake mixture (for the recipe, see the post #47 Pound Cake from all the way back in 2008!). Of course, you can use other fruits: I would imagine that halved apricots or sliced Cox’s orange pippins would work very well.
Bake at 180⁰C (350⁰F) for an hour.  A little before the hour is up, sprinkle over some granulated sugar and return the pudding to the oven.
‘Serve with plenty of cream, and put a bowl of sugar on the table in case the gooseberries were especially tart.’

#381 Baked Gooseberry Pudding. This was a great pudding! The layer of tart gooseberries was balanced well by the sweet cake topping that had developed a lovely dark, caramelised crust. A million times better than Eve’s pudding! 9/10


Tuesday, July 30, 2013

#380 Gooseberry Sauce for Mackerel


After the rather wet start to the summer, I was beginning to think that this year’s gooseberries were never going to arrive. Then we had that glorious stint of hot weather. Now we have so many gooseberries and other soft fruit, we barely know what to do with them. Well here's one thing, just as mackerel is in season. I like Jane’s introduction to this recipe:
On May 26th, 1796, Parson Woodforde [we have met him in the blog before, see here] and his neice, Nancy, had for their dinner ‘a couple of maccerel boiled and stewed gooseberries and a leg of mutton roasted’. In other years, they were not so lucky; the gooseberries did not always ripen for the arrival of the first spring mackerel.
Ms Grigson’s recipe is a very simple one indeed:
Begin by topping and tailing 8 ounces of gooseberries and then melt an ounce of butter in a pan. Add the gooseberries, cover with a lid and cook until soft. I love how they go from vivid green to an almost straw-yellow when heated.
Use your wooden spoon to crush the berries on the side of the pan to form a rough purée, you could, if you are so inclined, pass them through a sieve to produce a smooth sauce. I don’t see the point in these things normally; it’s not like gooseberry seeds are particularly offensive.
The tart flavour of the gooseberries is cut with either ¼ pint of double cream or béchamel sauce. I went for the latter for health’s and money’s sake. Taste the sauce and add a little sugar, if needed, don’t make it sweet like an apple sauce for pork.
That’s it! Very simple and not just for mackerel either, but other oily fish, roast duck, pork, lamb, veal and – no surprises – goose.
#380 Gooseberry Sauce for Mackerel. A triumph of good, simple cooking. The creaminess of the béchamel did a great job of wrapping its way around those tart gooseberries, so much so that only a pinch of sugar was required. I could eat it all on its no problem! 8.5/10

Tuesday, July 2, 2013

#379 Kidneys in their Fat


Another recipe from English Food that appeared at my pop-up restaurant last month. These kidneys were served alongside fried sweetbreads as an accompaniment to a roast saddle of lamb. The idea here being a way of introducing some offal into the meal, but making it an optional extra so that anyone that was squeamish did not have try it. I must say that they went down very well, with most of the guests opting to ‘excavate’ their own pink kidneys from their crispy fat. A brave lot they indeed were.

This recipe is close to Jane’s heart: ‘[A]lmost the first dish I learnt to cook on arriving in Wiltshire…[it] was a particular favourite of my husband’s.’

This is a very simple recipe. Ask your butcher for kidneys still covered in their suet, when you arrive home trim away any big chunks so that the kidneys are covered with about half an inch of fat. It won’t completely encase them, so when it comes to roasting them, make sure any bare kidney faces downwards, or use the fatty trimmings and cocktail sticks to cover the gaps.
Arrange the kidneys on a wire rack over a roasting tin and bake them in a hot oven - 230⁰C - for 20 to 30 minutes. Check them after 15 though. The perfect kidney will be hot and pink, so if still a little too red and bloody, leave for a few more minutes. For some stupid reason, I forgot to take in picture of the pink kidneys within. Sorry folks!

Serve the kidneys straight away with roast lamb, or as a first course with brown bread and mustard.
#379 Kidneys in their Fat. As an offal fan, I was really looking forward to this one. When done perperly, the kidneys are mild, sweet and juicy, it is only when overcooked that they take on that mealy texture and overly-metallic tang. The trouble is that there is such a tiny window between cooked to perfection to overdone. If you get it on the button, however, they are a simple and delicious treat 8.5/10

Sunday, June 30, 2013

#378 Elizabeth David's Potted Crab


This recipe I tried a couple of months ago and thought it so good, it should make an appearance as the fish course in my pop-up restaurant earlier in the month. The recipe has been lifted from a pamphlet by Elizabeth David called English Potted Meats and Fish Pastes. You can find the pamphlet in her anthology An Omelette and a Glass of Wine (a book any interested cook worth their salt should own). Ms David honourably adapted old recipes and updated them for the contemporary population. They still hold up today, I take some pride in taking up her baton – via Jane Grigson – albeit on a small scale, in showing that these dishes need to be brought back and celebrated. They are so different from the nasty little pots found on our supermarket shelves.

For this recipe you need to start with a large 2 pound crab – ask your fishmonger in advance to bagsy you a large, hefty-clawed male for you. If such a thing is not available, buy 2 smaller hen crabs. At home, dip into your toolbox for a hammer and root out your lobster tools (or alternatively a nutcracker and skewer) and get to work picking and scooping the meat from the crab, keeping the brown meat in separate pots from the white. It’s worth mentioning that you can buy the tubs of pre-picked crabmeat, but the result will not be anywhere near as delicious.

 
How do you pick a crab of its meat? This excellent walk-through guide from Channel 4 is very good. One day I’ll write my own, if I ever get round to it!

Season the crab meats with salt, black pepper, mace, nutmeg and Cayenne pepper, as well as a good squeeze of lemon juice. Now layer up the two meats in a single mould such a stoneware pot, or several smaller ones. Start with half of the white meat, then the brown and then the remainder of the white. Pack it down firmly and pour over melted slightly-salted butter; you will need around half a pound of butter altogether. Griggers here recommends Lurpak, which eats much better in this sort of dish.

 
Bake in a ban Marie at 150⁰C for 25-30 minutes. Remove and pour over some clarified butter. Allow to cool and store in the fridge covered with foil or clingfilm. If you put a good thick layer of butter over the crab, it will keep for several days. Don’t forget to take it out of the fridge a few hours before you want to eat it.

I served the potted crab simply with spelt bread and a lemon wedge.

#378 Elizabeth David’s Potted Crab. Absolutely delicious, the rich butter and creamy crab meat are suitably sharpened by the warming spices and lemon juice. This must be the best of the potted meat and fish dishes in the book and I cannot sing its praises high enough. 10/10
 

Tuesday, June 4, 2013

#377 Brandy Snaps


An English classic, one of which I have never made; I’ve eaten plenty of them of course, but never really bothered about going the whole hog and piping cream into them. Fearing I was a becoming a biscuit heathen I did a little research and found that in many parts of England, especially the south and London, people ate them on their own as large rounds, rather than the familiar cigarette shapes where they called them ‘jumbles’. Phew.

Don’t fear the brandy snap, it turns out they are not as difficult to make as people say, though a little patience is required for the first few before you get into your stride: too hot and they tear (and burn!), too cool and they cannot be shaped and break. Do them one at a time and if the others get too cool, pop them back in the oven for a few seconds to soften again. No probs!

This recipe makes up to 36 brandy snaps – that seems a lot, but they keep for weeks in an air-tight box.

To begin, melt together 4 ounces each of butter, golden syrup and granulated sugar in a saucepan. Mix until everything has melted and is smooth, but be careful not to let it boil. Take off the heat and when ‘barely tepid’ mix in 4 ounces of plain flour, a pinch of salt, 2 teaspoons of ground ginger, a teaspoon of lemon juice and 2 teaspoons of brandy. This seems like a paltry amount of brandy but it really does make a difference to the flavour.

Preheat the oven to 200⁰C (400⁰F) whilst you get on with spooning out the mixture onto baking sheets. The best thing to do here is to cover two large baking sheets with greaseproof paper and to spoon out sparsely teaspoons of the mixture; these things really spread so you’ll only want 4 or 6 spoonsful per sheet. Make sure your spoons are small, equal in size and neat; I found that using a melon-baller helped here.

Bake them for about 8 minutes until they have spread, darkened and bubbled up. Remove from the oven and let them cool a little before shaping. For the classic cigarette shape lift one of the paper using a palette knife – if it tears then it is too hot – and lie it across the handle of a wooden spoon and fold it over. Slip it off and do the next one; if too cool pop back in the oven. To make basket shapes, lie the brandy snap over the base of a jam jar.

If you want to fill the brandy snaps, whip up ½ a pint of double cream and pipe the cream inside. There’s no need to sweeten the cream here as the snaps themselves are so sweet.

#377 Brandy Snaps. These were absolutely delicious – crisp, slightly spiced caramels that cracked satisfyingly into bland cream (Bland is not always bad!). Lovely, and so much better than bought. Go make some! 9/10
 

Monday, May 6, 2013

#376 Eliza Acton's Sole Stewed in Cream


Eliza Acton (1799-1859) was a cook and poet. She was the first person write a cook book for normal folk like you and I, all the previous ones were written for the housekeepers and kitchen staff that ran houses and stately homes. Eliza was also the first to include cooking times and ingredients lists in her recipes. Years later Mrs Beeton based her much more popular book on Acton's writings. Cheeky!

This recipe comes from her famous book Modern Cookery, for Modern Families published in 1860. Old that it is, its simplicity seems quite modern to me; there are very few ingredients, just sole, salt, cream, mace, Cayenne pepper and lemon juice, and it was designed to show off the excellent flavour of a delicate fish.

If you can’t get hold of sole, use any other flat or white fish like brill, turbot, cod, haddock, pollack etc., though they will need to be cooked for longer.

Her recipe starts: Prepare some very fresh middling soles with exceeding nicety…

Ask the butcher to gut and scale a nice sole. At home, prepare it by trimming off the fins and place it in a close-fitting dish or pan. Pour around it boiling water that almost covers it, plus a teaspoon of salt, then let it simmer for just two minutes. Carefully pour away the water and pour in some cream so that it goes half way up the fish. Bring to a simmer and baste the fish with the hot cream until cooked through. This takes only four or five minutes, but if the cream thickens too much, let it down with some of the cooking liquid or some water.

Remove the sole to a serving dish and finish the cream sauce by adding some salt and a little ground mace and Cayenne pepper. Lift the sauce with a squeeze of lemon juice – a little under half a lemon did for me.

Pour the sauce over the fish and serve with boiled potatoes and some blanched and buttered cucumber dice, says Jane, though I expect it would work very well with a green salad or some quickly-steamed asparagus spears.
#376 Eliza Acton’s Sole Stewed in Cream. I loved this. The fish was lovely and moist and it flaked away from the bone very easily. The sauce was not as rich as you might expect, and its mild creaminess complemented the fish very well. There was also the added bonus of finding a large and handsome roe within the sole which also ate very well. Very good and very simple 8/10

Friday, May 3, 2013

#375 Boiled Silverside of Beef


Here’s a nice simple recipe that really shows off simple English cooking at its best. When I first started cooking boiled meats for the blog, it was always a disaster because the meat was tough and all of its flavour seemed to just dissipate away. It is for these very shortfallings that English food is viewed as bland and boiled to death. Here a joint of beef is ‘boiled’ with plenty of stock veg and spices, but really ‘boiled’ is the wrong word to use entirely because it’s poached rather than boiled. The most you want the water to be doing is giving off the odd tiny bubble and gurgle, a temperature of about 80⁰C. As soon as I realised this error, boiled meats have been coming out tender and delicately-flavoured, so I was looking forward to this nice, light recipe that seemed perfect for early spring.

It’s worth giving a few more pointers for perfect boiled meats: First, use a closely-fitting pot so that the vegetables can lend maximum flavour and so the meat juices don’t become too dilute. Second, use the best ingredients you can afford because it makes a world of difference to the finished dish. Try and get meat that has been hung properly by a real butcher, that pink nonsense you buy in the supermarket will simply not do. Lastly, season, season, season! Simple cooking like this depends on a good seasoning of salt and black pepper.

Although this recipe uses a piece of fresh meat, it is really a footnote to #161 Boiled Salt Beef & Dumplings and so appears in the Cured Meats part of the Meat, Poultry & Game chapter and not the Beef & Veal section.

Once you have your silverside of beef, you need to calculate the cooking time which I described in #150 How to Cure Meat in Brine.
 
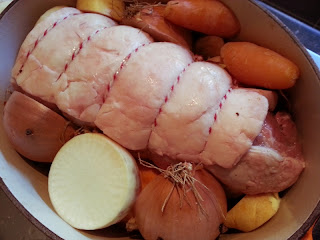
Put the beef into its close-fitting pot along with the vegetables and spices from #161 Boiled Salt Beef & Dumplings, which were: 2 large unpeeled onions studded with 8 cloves, 2 blades of mace, a small bit of nutmeg and plenty of black pepper. However, seeing as this meat is fresh meat and not strongly-flavoured cured meat, it will need a bit of a helping hand, so add also a parsnip, a carrot and a piece of turnip gives some extra flavour. Cover with water, bring slowly to a gurgle and simmer gently until cooked.
When ready, carve slices and serve with boiled potatoes, carrots and horseradish sauce. Although Jane doesn’t say it, I also added a couple of ladlefuls of the cooking broth to produce a meal not unlike #98 Cawl [which appears to have not been proof-read before posting].
#375 Boiled Silverside of Beef. I knew Griggers wouldn’t let me down on this one! It was beautifully and subtly flavoured with the sweet vegetables and meat itself was so tender. It really makes a great alternative to a roast on a summery Sunday. I reheated the next day and the broth was even better flavoured. Any broth left over makes ‘beautiful soup, says Lady Jane. 8/10

Monday, April 15, 2013

#374 Pease Pudding


Pease pudding is one of the oldest dishes, and most popular, in English history. The main ingredient in pease pudding is of course peas. The pea is one of our oldest cultivated crops mainly because it thrives in temperate climates and is quick to grow, and therefore, to select. Its easy-to-grow nature meant that it was good food for the poor where the poor were often forced to eat ground and dried peasemeal formed into loaves and baked like bread.

The etymology of the words pease and peas is interesting: the word originates from the Greek word pison, which became pisum in Latin, crops up in Old English as pise and then changes its spelling to pease. Oddly, the word pease was mistaken as a pleural and was therefore shortened to pea.

Pease pudding made up of dried, cooked and puréed peas enriched and flavoured with things like butter, eggs or onions. It used to be boiled in a well-floured pudding cloth, giving it the classic cannonball shape; and it wasn’t boiled simply in water alone, but with a piece of salt pork, ham or bacon, with which it would be served. It later would be boiled or steamed in a pudding basin, which is much more convenient, though I am sure the original way of cooking it in the ham stock would have produced a much more delicious meal. I love this pamphlet showing just how versatile pease pudding can be - pease pudding vol-au-vent anybody?
Before pease pudding there was pease pottage, which was essentially a thick soup made from pease and water, flavoured with scraps of meat and vegetables.

So, pease pudding was popular because it was cheap and plentiful. It was often made at the beginning of the week and eaten over the successive days, hence the old rhyme:

                                Pease pudding hot!
                                Pease pudding cold!
                                Pease pudding in the pot
Nine day’s old!

Jane suggests frying it up another day.

To make pease pudding, you first of all need to simmer a pound of dried green peas – whole or split, it doesn’t really matter – in enough water to just cover them until soft and tender. The times here can vary greatly – about 45 minutes to an hour for split peas, at least 2 hours for whole peas. It also worth mentioning that the age of the peas will affect the cooking time – old peas may need soaking overnight in water with a teaspoon of bicarbonate of soda. If you do soak them overnight, drain away the liquid they were soaked in before cooking in fresh water.

When the peas are tender, drain away any liquid and then pass them through a mouli-legumes or sieve and stir 2 ounces of butter and one beaten egg into the resulting purée. Season well with salt and pepper and spoon the lot into a generously buttered 2 pint pudding basin. Pop the lid on, or make a lid from buttered foil or cloth tied with string. Steam for an hour, then turn it out if you like, and serve with boiled bacon or salt pork or, as I did, with #373 Faggots and Peas.

#374 Pease Pudding. This was a most successful dish – the pease were sweet and well-flavoured. Plus I managed to eat it over the space of several days just like the song! It was best when I fried slices of it in lard so that a good crust formed and ate it with some left-over faggots. I shall do this again. 7/10