Thursday, October 18, 2012

#359 Rabbit


Clarrisa Dickson-Wright was on the telly yesterday as part of the BBC2 series The Great British Food Revival where various chefs and food writers highlight British foods that have fallen out of favour and are in danger of falling completely out of use. Needless to say, I approve. Ms Dickson-Wright’s food of choice was the humble rabbit.

Why has it fallen out of favour? There are two main reasons really – there’s the ‘Fluffy Bunny Brigade’ as Clarissa calls them that couldn’t possibly eat something fluffy and cute. This opinion is fine if you are vegetarian or vegan. Otherwise it’s a great double-standard. Another reason is the association with myxomatosis virus – a deadly bug that killed off 99% of them. It’s under control now, but mud sticks.

I think there are other reasons too: rabbit is thought of as poor people’s food, and people also have a problem with eating wild animals. Well the bottom line is that rabbits are a huge pest (they are not indigenous to the UK) and need to be controlled. In fact they are one of only two official game species, along with wood pigeon, that do not have a hunting season. We are over-run and they must be killed in order to manage the countryside efficiently.

It is for this reason that they are relatively cheap, and because they are wild they are truly organic and free-range and low fat too.

I coincidently cooked a rabbit recipe from English Food the other day. It’s less of a recipe and more of a suggestion really with very sparse instruction. Here’s the full entry:

Wild Rabbit

roast: 1 hour, mark 6, 200C (400⁰F)

inside: herb stuffing

serve with: see hare [redcurrant jelly, port wine sauces…]


Here’s what I did to roast the rabbit:

First up is to prepare your rabbit – you should find inside the kidneys, liver, heart and lungs. Remove those. If you like you can chop the liver and use in the stuffing. Instead, I made a little offal kebab from the heart, kidneys and liver. Then I larded the rabbit’s legs, loins and saddle with some thin slices of back fat. You can buy a special larding needle for this job but I used a skewer (it was a bit of a nightmare so I have bought myself a needle for next time). I then seasoned it inside and out and loosely stuffed it with the herb stuffing (see here for the entry for that) before placing it in a roasting tin with a jacket of back fat. You could use streaky bacon if you’d prefer.

Then it was straight into the preheated oven for an hour.

I had some stuffing left over so I rolled that into small balls and wrapped them in some smoked bacon. I popped those in for the final half hour until brown and crisp.

When the hour was up, I took the rabbit out of the oven and let it rest on a serving plate and covered it with foil. I then got to work on making some gravy. I put the roasting tin on the heat and deglazed it with a splash of red wine and then some chicken stock and a tablespoon of redcurrant jelly. After it reduced and started to thicken, I took it off the heat and whisked in a couple of knobs of butter to thicken it further and give the sauce a nice shine.

Hey-presto! A roast rabbit!

#359 Rabbit. Well I enjoyed preparing this one and it did look like something from a medieval feast when it was finished. The flavour was good, though it was on the dry side; my rabbit was a young one I think and perhaps could have done with 45 minutes. Nevertheless, a tasty and fun meal to eat, though not quite as good as the rabbit pie. It did make delicious soup the next day though! 6.5/10.

Wednesday, October 17, 2012

#358 Bloater Paste


The thought of eating fish paste may make people shudder, people would think differently if this recipe were named smoked fish pâté, I feel. However we are not French so fish paste it remains. Perhaps people think back to those nasty cheap homogenised pots of meat and fish paste from their childhood. If you make your own it is a very different creature and I am sure this one will be same.

The other thing that may put one off from this recipe is the name of the fish in question – the bloater. It’s not the most delicious sounding fish is it? There have been several bloater recipes and this is the final one, but if you are not in the know a bloater is in fact a cured herring. The cure is very similar to that of the kipper and the only real difference is that bloaters are cured completely whole giving them a more gamy flavour than a kipper. Because they are intact they bloat as they smoke, hence the name.

This is a nice straight-forward easy affair. Start by gutting your bloaters, removing any membranes from the cavity. I had just one, but was lucky to find two nice fat roes inside within so I reserved those and tossed the rest of the innards in the bin.

Pour boiling water over your fish and roes; the skin will curl and the body of the fish will noticeably tense and plump up. Leave for around 10 minutes to poach in the water. Remove the skin and flake the flesh, being careful to pick out any bones, don’t worry too much about the very thin hair bones, they will not be noticed.
 
Don’t forget to fish out the roes, should you have any. Weigh the fish and place in a food processor along with its equal weight in softened butter. Whizz up until you have a spreadable consistency you like. Season with ground black pepper, lemon juice and a little salt. Serve with hot toast.

You get quite a lot of paste – I got two 250 ml pots from just the one bloater. Not bad at all I reckon.

#358 Bloater Paste. This was delicious and light – the butter helped whip the bloater into a wonderful consistency and the lemon juice really accentuated the fish’s own natural piquancy. Very good. 7.5/10.

Sunday, October 14, 2012

#357 Comfrey Leaf Fritters


I have had the foraging bug of late so I thought I would try and make these fritters that appear to been lost to history. According to Jane Grigson, the 18th century writer Hannah Glasse gave a recipe for these fritters that use the plant comfrey. Oddly, I couldn’t find the original recipe anywhere – I found clary fritters and a recipe using comfrey roots – hey ho.

Comfrey is a relatively common plant found in ditches or beside hedgerows and river banks all over Europe. There are several species, but the most common in Britain is common comfrey with the Latin name Symphytum officinale, in case you want to find it in a field guide. They are quite easy to spot though: they have large broad leaves that taper to a point and the plant forms a bushy conical shape as it grows higher with younger, smaller leaves. The flowers are either white or purple, are small and arranged in little lines of about seven spikey blooms (though I didn’t count). The leave themselves are covered in slightly rough hairs that are very slightly irritating if the leaves are large.

One thing to point out, and I only found this out after eating them, is that comfrey leaves are a little poisonous and shouldn’t be eaten in large amounts, nor should they be eaten if you have liver problems. You have been warned.

Collect some large comfrey leaves that still have a fresh green colour; the large warty dark green ones don’t look very wholesome to me. Take them home, wash and drain them then remove their stalks. Depending what you are serving with them, you will need one or two leaves per person, more if you are using the smaller tender leaves.

Meanwhile make the batter by mixing together 5 ounces of flour and a pinch of salt in a bowl. Whisk in a tablespoon of oil or melted butter and up to ½ pint of warm water to form a batter the consistency of double cream. The warm water will help thicken the batter a little. Lastly, whisk an egg white until stiff and fold into the batter.

Heat up some oil in a pan ready to deep fry the leaves. You know you’re at the correct temperature when a small cube of bread browns in about 45 seconds. Dip the leaves in the batter and fry on both sides until the batter is crisp and golden brown, around 4 minutes in all. Don’t be tempted to overcrowd the pan – the leaves will stick together and the whole thing will take much longer to cook. Drain on kitchen paper and season.
I took a photo but can't seem to find it now. Whoops!
#357 Comfrey Leaf Fritters. I really liked these, though probably for the wrong reasons; the thin comfrey leaves were beautifully tender but essentially completely tasteless! The batter however was absolutely delicious – brown and crisp and bubbly and quite possibly the best batter recipe I have ever used. I’m going to give it 5.5/10 though because the star of the show should have been the comfrey, but it was just simply a vehicle for the divine batter.

Friday, September 28, 2012

#356 Salmon in its own Juices


It used to be associated with fine dining and the upper-middle classes, but today whole salmon is such great value in Britain today. The reason for this switch is the shift in focus within the fishing industry from wild to farmed salmon. Salmon farmers get a bit of a bad press: they are blamed for polluting our seashores and are accused of producing a low quality product that lacks the fullness of flavour and firm texture that wild salmon are prized for. Like all farmers, there are good and bad and it is very hard to know which are which. However if you are going to a reputable fishmonger they should be able to inform you about the farm; plus, of course, the price of the fish will be a good indication of the quality of the farm.
Scottish fishermen spear salmon as they leap upriver

If you do see any wild Atlantic salmon and you can afford it, buy it and cook it simply like in this recipe. I know this is not the sustainable thing to do, but if current research is correct, the wild salmon population in the United Kingdom has gone past the point of no return and it will become extinct sadly soon. It is past saving; sad but true. It is a world away from the pre-industrial age where salmon was so common in the River Mersey that they were used as pig feed!

This is such an unbelievably easy dish to make you would be a fool not to try it:

Get yourself a nice bright-eyed, firm fleshed whole salmon, ask your fishmonger to descale and gut it if he hasn’t already done so already.

At home give it a rinse inside and out and pat it dry. Unroll a piece of foil that is quite a bit larger than the salmon and smear it with butter, salt and pepper. Butter and the season the fish on both sides as well as within. Lay it on the buttered foil and lay another sheet of buttered and seasoned foil on top. Wrap it up to make a spacious parcel. If you want to serve the fish cold, rather than hot, use olive oil rather than butter.

Now you have two options: you can cook the salmon in a fish kettle or the oven.

For the fish kettle: To eat it hot, lay the wrapped salmon on the rack and place it in the kettle. If the salmon is too large for the kettle (as mine was) behead the fish and wrap the head up separately. Place it over two hobs, cover it with ‘tepid water’ and slowly bring to a simmer. Let it simmer gently for five minutes, then turn off the heat and let it sit in the water for 15 minutes more, then remove and unwrap. If you want to serve it cold, bring the water to a boil and then turn off the heat and allow the salmon to cool in the water.

For the oven: To eat it hot bake in the oven at 180C (350F) for 50-60 minutes. If you doubt how long you should keep it in the oven, the fish is best served a little undercooked. However, this method ensures that the fish never dries out so worry about it leaving it cooking to long. To eat cold, put the fishy parcel on a baking tray and bake for an hour at 150C (300F) if under five pounds, if over bake for 12 minutes per pound.

Unwrap your fish and place it on a serving dish and get to work on making it look pretty.

You have an easy job if you are serving it hot because all you have to do is remove the skin and add a bit more salt and pepper. Make a hollandaise sauce by first boiling down any juices to a concentrated stock to use as the base to it. Check out this link if you want to use Jane Grigson’s own recipe for hollandaise sauce (though I think Gary Rhodes’s is the best and most fool-proof recipe).

If you are serving the fish cold for a buffet, you can get creative with the decoration. Skin it and remove the thin layer of brown meat if you like – though Griggers does say that she finds it ‘far too delicious to discard’. If you are used to cooking fish, you could try and remove the fillets take out the bones and then replace it. Adding cucumber scales to the fish used to be a common way to present a fish cooked like this, but I think it is best left alone. If you removed the head lay it down in front of the body and hide the join with ‘a ruffle of mayonnaise’. For Jane’s mayonnaise recipe click this link.

#356 Salmon in its own Juices. I served the salmon hot with hollandaise as suggested and some simple boiled vegetables. I thought this was delicious in its simplicity: essentially just salmon, butter, salt and pepper. The fish was moist and flaked off the bone whilst still yielding plenty of moisture. The hollandaise too was delicious, flavoured with those delicious concentrated juices. Excellent stuff! 9/10.

Monday, September 24, 2012

#355 Devilled Herring or Mackerel


When I was in America there was one part of English Food I had to almost ignore: the Saltwater Fish section of the Fish chapter. This is because the seas surrounding the USA and the UK contain different species of fish. Mackerel and herring were particularly difficult to get hold of and when they were around they had been imported from Spain!

I thought I would get going with this simple recipe where the herring or mackerel are painted with a spicy mixture (the ‘devil’) and grilled. Devilling was a popular way of livening up almost any kind of food that really caught on during the Victorian and Edwardian eras. If you are not used to cooking fish, this would be a great place to start I think.

This recipe serves six, but it can easily be scaled up or down.

Get yourself 6 fresh herring or mackerel and ask the butcher to clean them reserving any roes should they have them. Roes are usually found around February time so there were none for me!

At home preheat the grill, then rinse the fish inside and out, pat them dry and make several diagonal cuts down the sides of each one then get to work on that devil. Mix together 3 tablespoons of Dijon mustard, 2 teaspoons of sunflower or groundnut oil, ¼ teaspoon of Cayenne pepper and a good pinch or two of salt.
 
Using a brush, paint both sides of the fish with the devil. If you do have roes, paint them too and slip them inside the fishes’ cavities. Roll them in dry breadcrumbs (you’ll need about 3 ½ ounces), then sprinkle with around 3 ½ fluid ounces of melted butter.

Line your grill pan with foil and the fish on it. Grill 6 minutes one side, then 6 minutes on the other, basting every now and again. The skin should blister and begin to blacken. Serve hot with lemon wedges and some sprigs of parsley.

#355 Devilled Herring or Mackerel. This was very good; the fish was perfectly cooked and the skin had gone nice and crispy. However, there was no way near enough of the devil mixture on the fish, in fact I hardly noticed it. If you try the recipe, I would double the amount of mustard and Cayenne pepper at least, or perhaps exchange the Dijon mustard for hot English mustard. Very succulent fish, but there was nothing devilish, and so because of this I am going to give it 5.5/10.

Friday, September 21, 2012

#354 Passion Fruit Curd


Well there goes the Great British Summertime, but don’t worry our Griggers is at hand to give us a little bit of tropical sunshine with this rather unusual fruit curd recipe. She must have been rather ahead her time with this one – I think the first time I ever saw a passion fruit in a greengrocer’s shop it was around 1990. I love fruit curd and am always on the lookout for new recipes – especially for the stall. Jane does suggest giving all sort of fruits a go; raspberries, gooseberries, apricots – knock yourselves out, she says (I paraphrase).

This curd is unusual in that it is made in the same way as custard:

You will need 4 large, 6 medium, or – in my case – 8 small passion fruit. Halve them and scoop out the pulp, seeds and all, into a small saucepan. Stir in 4 ounces of sugar and 4 ounces of slightly salted butter that has been cut into cubes over a low heat. Meanwhile, beat 3 large eggs (or 2 large eggs and 2 egg yolks) well in a bowl. When the sugar has dissolved and the butter melted, turn up the heat until it boils then tip it into eggs , furiously whisking to prevent the egg from curdling. Pour the custardy mixture back into the pan and stir over a low heat until it becomes quite thick. If you want to err on the side of caution use a double boiler or a glass bowl over simmering water. I found you don’t need it for this recipe, though I did use a thermometer so that I could get the curd as thick as possible without it curdling – you want a temperature of 78C (though Jane gives a temperature of 80⁰C, but I always find this too high for curds).

Remove from the heat, but mind you still keep on stirring it – the residual heat of the pan may still curdle it – then pass it through a sieve, making sure you work all of the curd out. Stir in a few of the seeds and add a tablespoon or so of lime juice to sharpen it a little. Pot into sterilised jars, let them cool then seal them. It will fill two 200 ml jars.

#354 Passion Fruit Curd. This was a strange one and no mistake. The flavour of cooked passion fruit is rather different to fresh – it’s weirdly not unlike fresh bread, and it took rather a while to get used to it. I ate it on toast, but I reckon it would have been a fantastic filling to a sponge cake. Also, they coordinated very well with my kitchen decor. 6.5/10.

Wednesday, September 12, 2012

#353 Roast Rack of Lamb with Laverbread


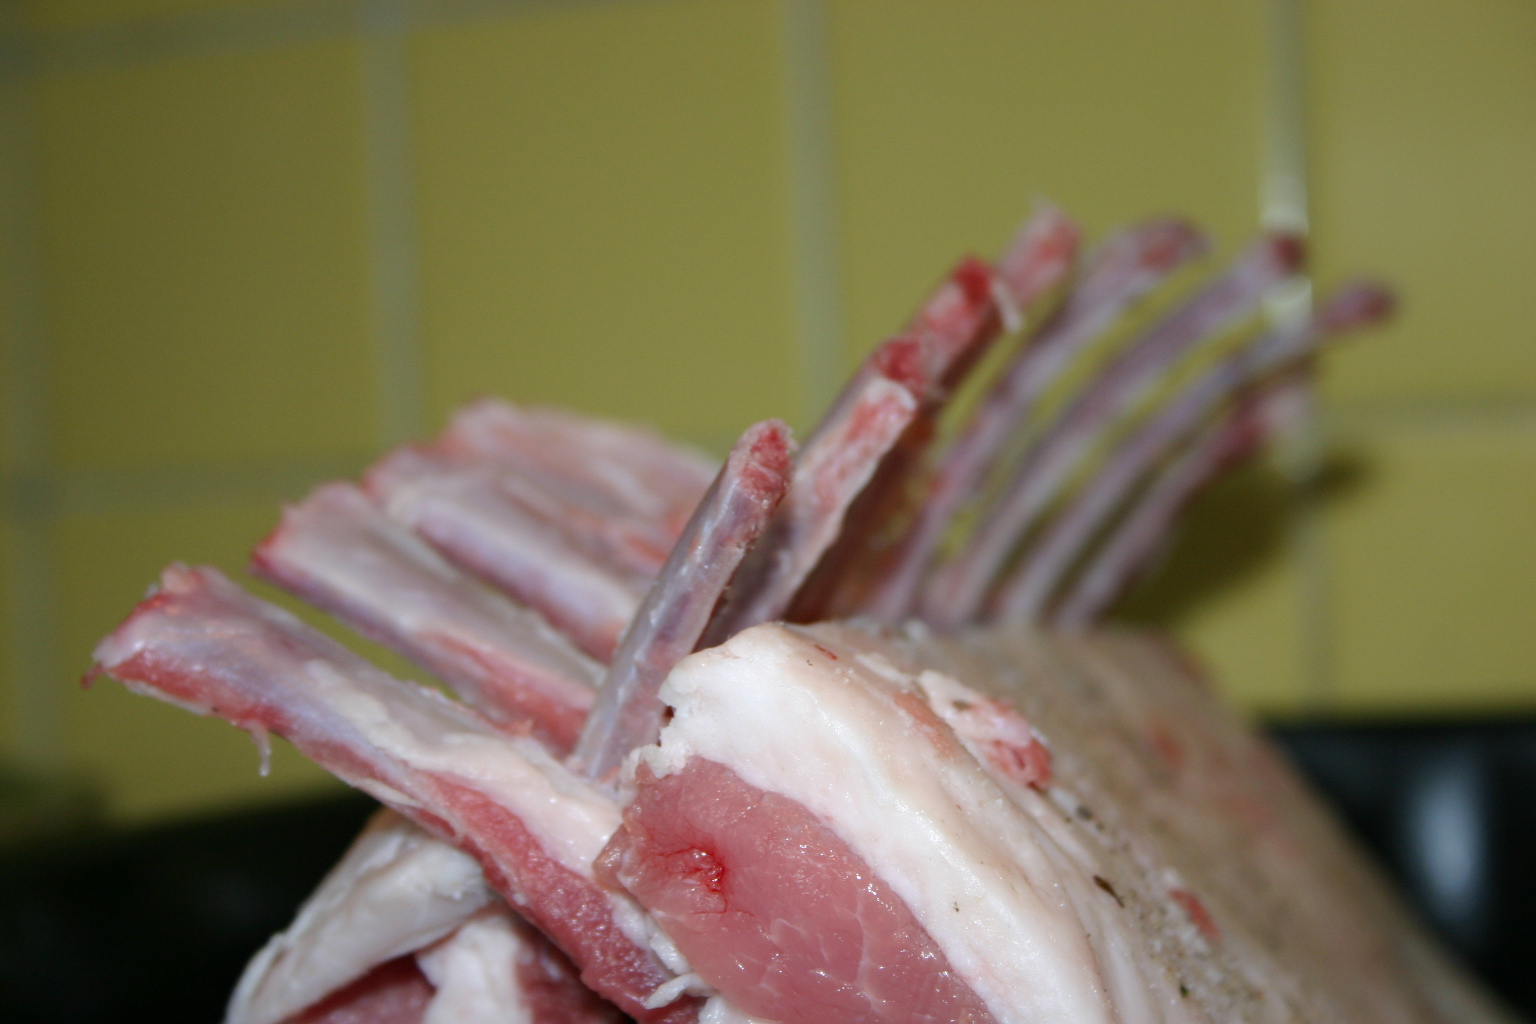
A second post involving the Welsh speciality laverbread; a deep green gelatinous sauce made from well-stewed seaweed known locally as laver (see the previous post). I still had some left over for this recipe which I made for my friend Charlotte – a veteran of my cooking, poor woman – as it was her birthday and luckily she requested lamb.

This is a recipe that I couldn’t do when I was in America because what you don’t want are nice pre-butchered racks, but a whole best end of neck. This is the upper part of the back and ribs that sequesters the beautifully tender lamb cutlets. If you can, wait until the lamb are a little older; these muscles don’t do much work so they don’t have as much flavour as, say, leg. Older animals have worked a bit longer so there is some make up in the flavour department. Also, they’re much bigger so you get more meat in your best end of neck.

Anyways, ask the butcher for one best end of neck, then ask him (or her) to split it down the centre, removing the backbone. Take the meat home, including the bones that he removed and you paid for!

Now prepare the lamb ready for roasting by cutting away any fat and meat from the ribs, don’t go too far down – maybe and inch and a half at the wider end and an inch at the thin end.


You should end up with two racks that can be propped up against each other with bones interlacing like fingers. Now take a clove of garlic and slice it thinly. Make holes down the fatty sides of the racks with a very sharp pointy knife and slot a sliver of garlic in each one. Season the lamb all over and put it in a roasting tin so that the ribs criss-cross.


Cover the exposed bones with a piece of foil so that they do not burn. Roast the lamb for 45 minutes at 220C (425F) for pink lamb, going up to 60 minutes for well-done (though cooking it well done would be a travesty in my humble opinion).

Next, make the gravy by first making a lamb stock from the bones and trimmings (this bit can be done well in advance). Add them to a saucepan with a carrot and a tomato both roughly chopped, a pint of beef stock and some salt and pepper. Bring to a simmer and let it tick away for a couple of hours or more if you can. Pass through a sieve and cool. Remove the floating fat and return to the pan with a glass of white wine or vermouth. Reduce until you get a well-flavoured stock. Lastly, slake a tablespoon of cornflour with a little cold water and stir into the stock to produce a nice gravy.

When the lamb is ready, take it out of the oven and cover with foil and let it rest whilst you make the laverbread sauce. Melt 3 ounces of butter in a saucepan and add a pound of laverbread. When hot, stir I the juice of 1 lemon and 2 oranges. Season with salt and pepper.

Place the lamb in the centre of a serving dish, pouring any juices in the gravy. Pour the sauce around the edges of the lamb and then decorate with thinly sliced oranges.

#353 Roast Rack of Lamb with Laverbread. Well the meat (which I cooked pink) was absolutely delicious, tender and well-flavoured. I wasn’t sure about the laverbread at first – it not being cut by the bland oatmeal like in the previous recipe – but I soon got used to it. The taste is very strong, but when eaten with the lamb you can see why they are eaten together so often. The gravy too was excellent; mild and not in the slightest bit greasy as lamb gravy can so often be. 9/10


Friday, August 31, 2012

#352 Laverbread and Bacon


A couple of weekends ago, Hugh and I popped down to Swansea for a wedding. It is a very nice city, with a very nice market. Whilst there I was very keen to get hold of some Welsh laverbread; there are a few recipes that use it so I bought a couple of tubs. I am always keen to try new foods and I had never eaten laverbread; always excited to see another species added to my list!
Laverbread does not contain any bread, but is in fact a species of seaweed found on the rocky seashore of Wales and is rarely seen outside of the borders. It is however, available online pretty easily if you’re not in or near Wales.
Plate from an unknown book - laver is number 4
 
According to my Traditional Welsh Recipes teatowel, to make laverbread, you need wash your laver (the algae Porphyra laciniata) and, without any additional water, simmer it until it becomes dark green gelatinous pulp – about 4 hours. Drain the leaves and chop them, adding salt to taste; and there you have it, laverbread, or bara lawr as the Welsh call it. Laverbread is traditionally fried in small balls or patties in bacon fat. It doesn’t take long because the laverbread is already cooked.
 
There are several seaweed based recipes in English Food, I have already covered one using the seaweed dulse, yet no one in England really eats it, and the tradition is slowly dying in the two remaining seaweed-eating nations in the British Isles: Wales and Ireland. In the past everyone used to eat it, but like many foods labelled ‘peasant food’ a stigma was, and still is, attached. It is strange that in most other countries people are so enthusiastic about their peasant foods – they are the comfort foods! – yet most of us turn our noses up at them.
Didn’t mean to get into a lecture there, but whatever falls out of brain ends up on the post. Anyways, as a rookie to the ways of laverbread and how to cook it, it went for this simple recipe that would hopefully be a good introduction.
Take a pound of prepared laverbread and mix in enough fine oatmeal to make soft, coherent dough. Roll into balls and flatten slightly. Fry in bacon fat for a few minutes per side or until nice and golden brown.
 
Serve with bacon in a mixed grill or a fried breakfast. I did something a little healthier and used the bacon I fried to flavour vegetable soup, and used the laverbread patties almost as dumplings.
#352 Laverbread and Bacon. Well I have to say I was impressed with the laverbread. I was subtly flavoured with iodine just as mussels and oysters are, but there was no fishiness to it. If I was living in Wales, laverbread and bacon would definitely be on my Sunday breakfast list. 7/10.
 

A New Venture


I do apologise so very much for being tardy with Neil Cooks Grigson, I have been crazily busy since my move from St Louis, Missouri (US of A) back to Levenshulme, Manchester (UK of A).

However I have not been lazy and I have exciting news; I have started up a food business! It is in its very early stages, but I have had more success already than I hoped. The business is called The Buttery (I couldn’t waste a surname like mine!) and it sells traditional British foods; some classics and some long-forgotten. I have built up such a list of amazing recipes over the years with my two blogs, I thought I should share the wealth and give the business a whirl. So over the last few months I have been designing logos, coming up with menus and working out how the hell I’m going to do this! Needless to say it has taken over my life.


Aside from selling some good proper food, I want the business to be community-based in two different ways: firstly I want to support local businesses and promote the excellent produce that is practically on our own door-step; secondly, I want to offer cookery lessons to the surrounding community, not fancy cooking but basic skills like bread and stock making. If I can get a community grant from the government I’ll be able to do the lessons for free too.

 
However all of this is in the future, so to start off I am doing the local artisan markets in South Manchester. My first one was in Levenshulme last Saturday and it was a complete success. If you live in Manchester, keep your eye out for me in the local markets.

The food that I am making fit into four broad categories and many of them appear either on this blog or British Food: A History: Savouries, Desserts, Teatime and Preserves & Pickles.

I would love it if you had a look at the website to tell me what you think (www.buttery.org.uk). If you have any special requests or anything blindingly obvious I have missed out, do let me know!
Now that I have had my first market – and it was nerve-wracking on the day – I promise to add posts much more often. Also, I’ll keep you posted with any further developments.

Chao for now!

Wednesday, August 15, 2012

#351 Potted Cheese


Sorry for the quiet blog folks, I am still organising my life after my recent move back to Manchester. The dust has settled enough however, for me to do this recipe for potted cheese that I have had my eye on for a good while; I couldn’t make it in America as I couldn’t get hold of the required Cheshire cheese for love nor money (and if I could it would have cost a pretty penny, let me tell you).
Potted cheese was very popular from the mid-18th century as a way to use up left-over dry cheese and rinds and pep them up a little and make them edible and delicious once more. The cheese is potted just like potted meat or fish: mixed with butter and seasoned with alcohol and spices.
Any cheese can be used: Cheshire, Stilton, Gloucester, Wensleydale, Gorgonzola, Roquefort, whatever you have available. It then needs to be moistened and seasoned. Jane makes some suggestions as do many 18th century books: white wine, sherry, port, Worcester sauce, chili vinegar, black pepper, chives, mustard, Cayenne pepper, ground mace. The list goes on. Jane uses any leftover cheeses and combines them to make a single that is ‘a far more rewarding result than any cook deserves’, we mix our grapes to make blended wines, so why not cheese? Hannah Glasse says ‘a slice of [potted cheese] exceeds all the cream cheeses than can be made’. This is all high praise indeed. The recipe that Jane specifies uses Cheshire cheese, port or sherry, Cayenne pepper and walnuts.
Take 3 ounces of butter out of the fridge in good time so that it can soften. Next prepare 8 ounces of Cheshire cheese – cut into cubes and reduce to a crumble in a food processor or grate if doing by hand.  Add the butter and two tablespoons of port or brown sherry to form a paste. Add a good pinch of Cayenne pepper. Jane now tells us to either form into small cheese truckles and roll them in chopped walnuts, or to put in pots and cover with clarified butter if the potted cheese is to be kept for a while. I found the cheese truckles easier to make after the mixture was allowed to sit in the fridge overnight.

 
#351 Potted Cheese. I was very much looking forward to making this recipe, mainly because Jane is so enthusiastic about it. When I first made it I wasn’t too sure, I found it grainy and thought the alcohol didn’t quite work. However, I tried it again after a night in the fridge and it had transformed – the port had soaked into the grains of cheese to produce a creamy homogenous cheese truckle. It’s very good on an oatcake. On the strength of this, I’ve gone out and bought a few different cheeses so I can try a few combinations myself. 7/10.

Friday, August 3, 2012

#350 Harold Wilshaw's Broad Bean and Avocado Salad


This recipe – the 350th – is the last I shall cook in America because tomorrow morning I fly back to England. It has been a great place to carry on the blog; there were many foods that were tricky to get hold of in Britain that were easy to find in the USA. The Americans’ love of freshwater fish and shellfish (particularly oysters) really helped me out in the Fish chapter and I managed to find lots of offal like pig’s heads, lamb’s heads, tongues and sweetbreads. The other great thing was that all my friends were so game to try the often strange things I served up to them, and I thank them very much for that.

This recipe would not seem strange to an American – a salad made from avocados and broad (fava) beans, but this would have been an extremely exotic dish in England during the 1970s where the avocado was very much the new kid on the block in the greengrocer’s shop. Of course, for that very reason, it makes this recipe a contemporary one – at least when the book was first published – perhaps Jane was doing her bit to introduce a new taste to the 1970’s English palette. It never became a classic recipe, but full marks to Griggers for effort.

I wanted to do this recipe before leaving St Louis because avocados are so delicious here and so flavourless in England. It’s a very simple one that marries together broad beans and avocados; two vegetables that I would never have thought about putting together. If only Hannibal Lector had known, he might not have been done for cannibalism:


I ate his avocado with some fava beans and a nice Chianti.
Num um um-um-um

This recipe comes from the ex-Guardian food writer Harold Wilshaw, whose name I always read as Harold Wilson when I flicked through the pages of the Vegetables chapter. He apparently he ‘thought up this particular salad when unexpected guests arrived and there wasn’t much in the house.’ How bourgeois of him to have an avocado just lying around in his house.

To make the salad start by podding some broad beans and boiling them for around 5 minutes. Drain and then begin the task of removing the thick seed coat. It’s not has fiddly as you might think; if you make a nick in one end of the bean, you can quite easily squeeze out the bright green bean from within.


Slice an avocado and arrange it on a plate along with the beans and drizzle over a simple vinaigrette made from either cream and lemon juice, or olive oil and vinegar. Season well and scatter over some extras if you like: chopped parsley, chives, spring onion or coriander leaves are suggestions as well as air-dried Cumbrian ham or Parma ham.

#350 Harold Wilshaw’s Broad Bean and Avocado Salad. Well I have to that this was an absolutely delicious and simple salad. Both vegetables are sweet in flavour, but have very different textures. I just hope I can get hold of avocados good enough to make it! 8.5/10


Thursday, August 2, 2012

100 recipes to go!


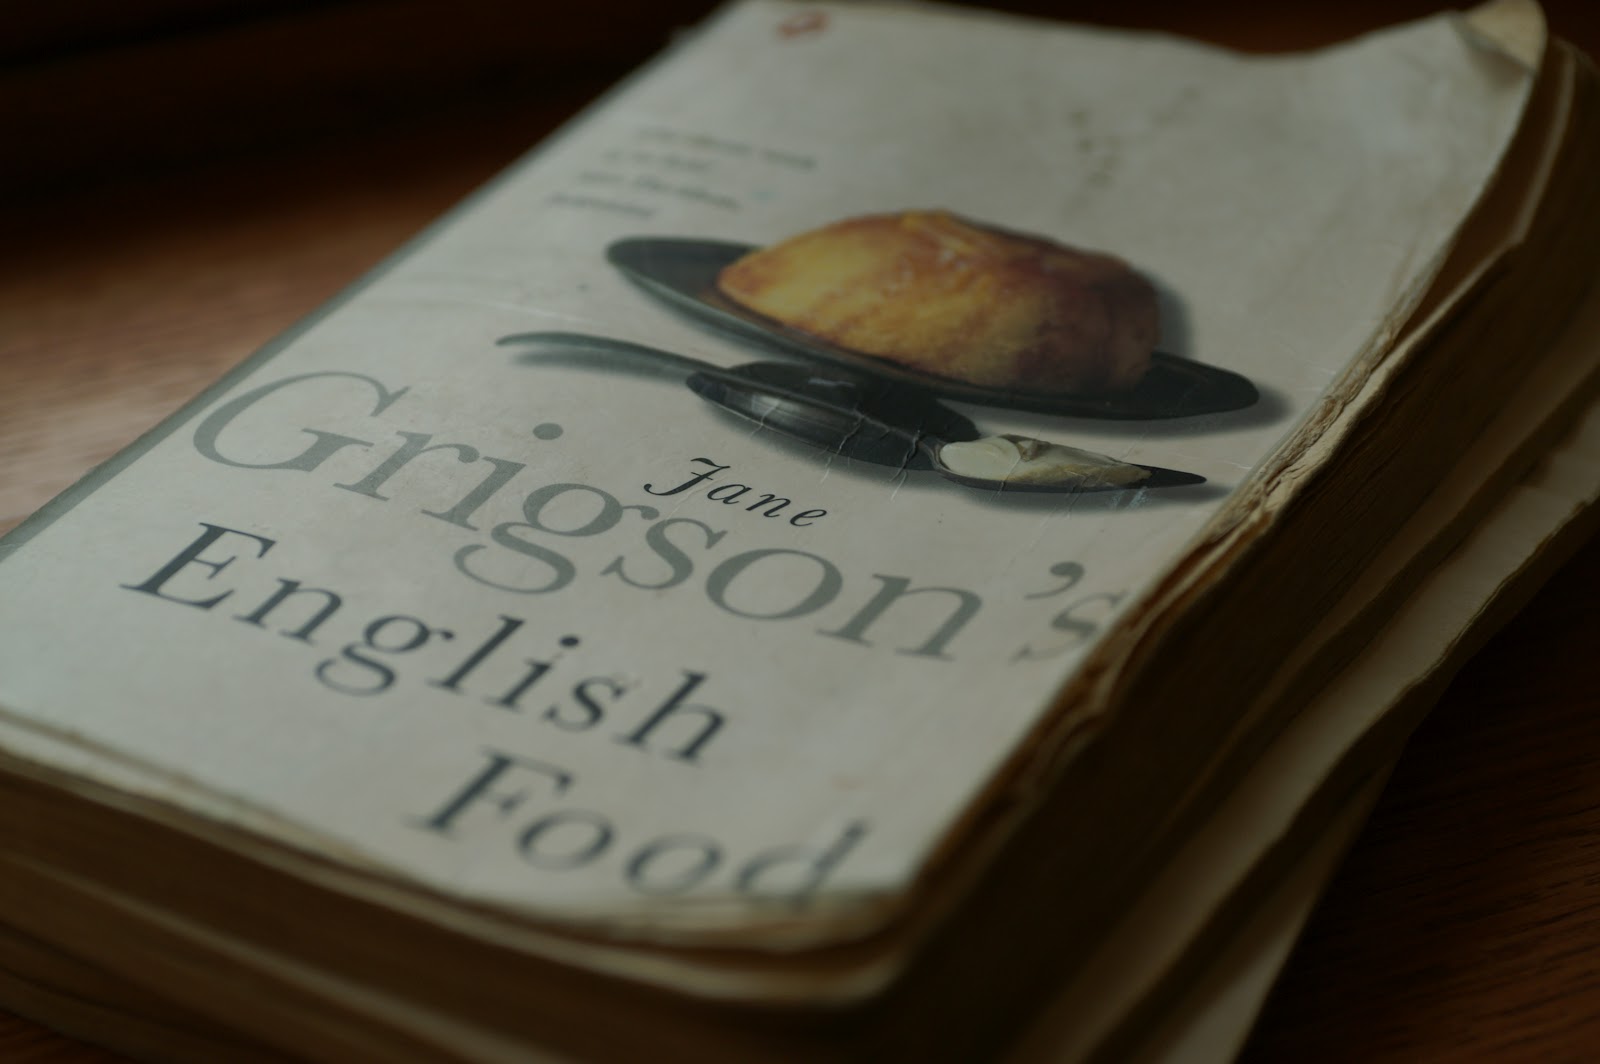
Who would have thought that I would still be working my way through English Food? Not my fickle self, that’s for sure. My copy is looking very dog-eared now; most of the pages have come loose, the cover is tatty and there's food all over it. I do hope I don’t have to buy another copy before I finish the whole book (if I ever can finish it).


I might be in the final 100 recipes, but there is still quite a way to go really – if I average out at five recipes a month that’s still 20 months of blogging yet to do. I hope you all keep reading the blog and adding your excellent comments to the post.

Laters!

Wednesday, August 1, 2012

#349 Poor Knights of Windsor (1937)

The Poor Knights of Windsor was a charity set up centuries ago by Edward III soon after he created the Order of the Garter in the mid-14th century to give alms to old and retired soldiers that had lived to protect the country. Quite ahead of his time, I think. How this dessert came to be called Poor Knights of Windsor I do not know. The earliest mention of this dessert I can find crops up in Elizabeth Cleland’s 1755 book A new and easy method of cookery.

Edward III creates the Order of the Garter

Almost 2 years ago I made the 1420 version of this dessert, also called pain perdu. This medieval recipe gave reasonably precise instructions to make it (see here for that post). Perhaps surprisingly, this more recent recipe from Ambrose Heath’s 1937 book Good Sweets, is rather scant on instruction:
Cut a French roll in slices and soak them in sherry. Then dip them in beaten yolks of eggs and fry them. Make a sauce of butter, sherry and sugar to serve with them.

Brevity is obviously his middle name. Here’s what I did…

First I took some of Jane’s advice and that was to use not just any old French roll, but a nice, rich brioche (like it wouldn’t be rich enough without!?). Although brioche wasn’t around much in the 1970s it is widely available these days.

I beat a couple of egg yolks with a little water just to make them easier to work with. I took a slice of brioche and sprinkled it liberally with dry sherry, then dipped it in the egg yolks and fried them on a moderate heat in a frying pan with butter. I kept the poor knights warm in a low oven whilst I got on with making the sherry sauce.

I melted 2 ounces of butter slowly in a small saucepan, then I turned up the heat and stirred in a tablespoon of sugar.  When it had dissolved and was bubbling away, I added 2 tablespoons of dry sherry and that was it! Very simple indeed.

I served up the poor knights with a little of the buttery sauce drizzled over them.

#349 Poor Knights of Windsor (1937). It’s not very often that I make a recipe from the book just for myself, but  this one I did. I thought it would be awful – I don’t usually like alcohol in desserts, but I was so, so wrong! It wasn’t as rich or as heady as I expected, the secret was to make the sauce very sweet and to liberally sprinkle the brioche with the sherry, rather than soak it. Very good 7/10.

Monday, July 30, 2012

#348 Veal Rolls


Here’s a quickie from the Beef & Veal section of the Meat chapter and I shall Jane Grigson herself tell us what to do for this one:

Allow one large, thin, escalope of veal for each person. Spread it with a thick layer of parsley and lemon stuffing, or herb stuffing and roll it up starting with one of the long sides.


Tie it with thread in three or four places, then cut into three or four pieces.


Brush each piece with beaten egg, dip it into flour and string it on a skewer, one skewer for each person. Grill for 20-30 minutes, preferably on a spit, basting them from time to time with melted butter. Serve them with fried mushrooms and lemon quarters.


#348 Veal Rolls. Well these were a little fiddly to make but not infuriatingly so. I used the parsley and lemon stuffing as I hadn’t made it for a while and I thought it would suit the hot weather we’re having here in St Louis. As much as I like veal, I didn’t find this really worked. I tried to keep the rolls basted and evenly-cooked under the grill, but the whole thing turned out a little dry. I would much have preferred to have had the escalope fried in some butter with stuffing baked in an ovenproof dish served separately. The mushrooms were good though! 4/10

Saturday, July 21, 2012

#347 Sawce Noyre for Roast Capon

This recipe for black sauce was popular all over Europe in the Middle Ages with many variations and alternative names like sauce infernal. They all use fried and ground livers as a base. In England it was served up with roast meat; capon in this case was used as were various game birds. Other countries used other additional flurries such as Parma ham, dried ceps, onions or garlic and spread it on toast or bread.

A banquet in the Middle Ages - this is a French picture
though at the time French and English food was very similar

The recipe comes from a manuscript with the rather clinical name Ashmole MS. 1430, dating unsurprisingly from 1430. To put the year in context, Henry VI of the House of Lancaster is on the Throne; the political bubblings are beginning that led eventually to the War of the Roses around 20 years later. The original hand-scribed pages are kept in the British Museum, but the manuscript did appear in print along with some other 15th century cook books in the late 19th century.

Henry VI, the Child King

Jane doesn’t give the original recipe that she bases hers on, but I did find it online. It is written in Middle English and takes a little deciphering:

Black sauce for capouns y-rostyde.—Take þe Lyuer of̘ capouns, and roste hit wel; take anyse, and grynde parysgingere, and canel, and a litil cruste of̘ brede, and grynde hit̘ weƚƚ aƚƚ to-gedre; tempre hit up wiþ verious, and þe grece of the capon, þanne boile it̘ and serue forþe.

I translate it as:

Take the livers of capons, and roast them well; take aniseed, ground ginger, and cinnamon, and a little crust of bread, and grind it well all together; temper it up with verjuice and the fat of the capon, then boil and serve forth.

Going back even further in time to the very first known practical cook book – Forme of Cury – written around 1390 contains a recipe for mallard in black sauce.

I made it to go with roast chicken rather than roast capon and it is best made whilst it is resting so you can skim off the fat from the roasting tin and use it to fry the livers.

Pass a beady eye over a pound of chicken livers, making sure that there are no big gristly bits or little green bile ducts left on them. Heat some chicken fat in a frying pan and add the chicken livers. Make sure that the heat is really high so that the livers brown nicely whilst keeping the insides moist and pink. This should take about 4 minutes in all – though it might be worth poking one of the biggest livers with a slenderly-pointed knife to check that the liver is not still raw. Medium rare is good, but anything less than that could be risky, there are several cases every year of Campylobacter brought about by eating undercooked chicken livers.

While the livers are frying, demolish a slice of bread, crusts removed, in a food processor; or if you want to keep it old school you can grate it.  Tip in the livers and whizz again – old-schoolers can pass them through a sieve or mincer. Season with the spices: I went with a quarter teaspoon each of ground aniseed (you could also use star anise), ginger and cinnamon. Don’t forget the salt and pepper. Give it a final spin in the food processor.  The sauce will be very thick indeed – it should be a spreadable consistency and not in the least pourable. It looked like a big scoop of liver ice cream – except that it was hot! Strange.


Reheat the sauce and add some cider vinegar or lemon juice to taste (or verjuice like in the original recipe – you can buy it online). If it is really thick, let it down with a little water.

#347 Sawce Noyre for Roast Capon. This was a strange one indeed – it was made up of pure liver and was therefore very rich, though when eaten with a big piece of relatively bland chicken it did balance out better. The best way to eat it, it turned out, was to spread it on some bread as those in mainland Europe did. I liked the spice combination a lot, especially the aniseed; I may use it in chicken liver pâté. Aside from that though, I think this one’s left in the history books! 4/10.

Saturday, July 14, 2012

#346 Pice ar y Maen (Welsh Cakes on the Stone)


The griddle (or girdle) cakes in this book have been a bit mystery to me in that there are a fair few, so they’re obviously greatly-loved, yet they have all been rather dry, often with the raw taste of flour and more like a bit of cooked, badly-made, pastry. The problem is, I don’t really know what they should be like in consistency as I have never eaten one outside of Neil Cooks Grigson, and there is often little guidance from Jane as to how much liquid goes in. This time I am going to add more liquid so that it is more like a biscuit dough to see if this makes a difference.

Pice ar y Maen are traditionally made on St David’s day in Wales, but like the pancakes made on Shrove Tuesday, they’re made all year round too. Apart from the inclusion of the spice mace in the recipe, it’s made up of ingredients that are likely to be in the store cupboard.  

Sift one pound of flour with a teaspoon of baking powder, a good pinch of salt and a teaspoon of ground mace


Next rub in with fingers, pastry blender, mixer or processor 4 ounces each of butter and lard. Stir in 4 ounces of raisins or currants and 6 ounces of sugar. Now beat in 2 eggs along with a little milk. You need a dough that is soft, but not so much that it falls apart and sticks to the rolling pin and worktop. I prefer to be generous with the liquids.


Strew plenty of flour and roll out thinly – if the dough is too sticky to do this easily, knead in some more flour. Cut out into dinner plate-sized rounds, though I think a 3 inch diameter round works best as they are easier to turn.

Heat a little bit of lard in a heavy-bottomed pan, cook for about 3 minutes per side.

Rather than serving with butter and syrup, Griggers says you should turn them in the extra sugar.


#346 Pice ar y Maen (Welsh Cakes on the Stone). Well I have to say that these have been the best of the griddle/girdle cakes so far – the other ones have been dry (though I think this difference is due to the fact  I have become a better cook).  They were light and a little stodgy – in a good way – they were certainly sweet enough and they sent the delicious aroma of mace into my kitchen as they cooked. Very good, though I did have to add a little butter, I must admit. On the strength of this, I think I need to revisit the other girdle cakes. Very good 8/10.

Wednesday, July 11, 2012

#345 English Apricot Pie


Flowers and Apricots by Joseph Bidlingmeyer, 1850


I have been eyeing this recipe for a good while, but fresh apricots are so pricey I have always put it off. However, Soulard Farmers’ market came to save me from my apricot fast by selling them for just over a dollar a pound! They were delicious too.

The reason apricots are so expensive is manifold: they flower very early and suffer poorly from bad weather – they will die even if there’s a light frost or a high wind; they don’t take to grafting well; they are very particular about the soil they grow in, to the point where the amount of fertiliser dug into the soil needs to be calculated; they also do not travel well. They are delicate things and much prefer Eastern climbes as they originated in China, coming to Europe via India and the Middle East. It is for all these reasons that you usually find apricots dried rather than fresh.


As an aside, the reason the apricot doesn’t take to grafting is because they were mis-classified as a member of the plum family, Prunus, and were grafted onto other Prunus species, cherry is usually the grafters’ favourite. It is actually part of the rose family. Everyday’s a school day.


So what are the benefits of eating this temperamental and pricey fruit, other than that they are quite delicious? Well there is quite a long list of benefits to eating apricots. The 18th century French writer Bernard le Bovier Fontenelle, who was a member of the Royal Society, lived to 100 years old and the secret to his longevity was apricots, a tip he got from his grandma. ‘A royal fruit, she called it, saying that the scatterbrained folk of our days ought to make more use of it.’ Quite.

Fontenelle

As it happens, apricots are high in phosphorus and magnesium and can significantly increase mental ability. They are super-rich in beta-carotene (which gives the fruit its yellow colour); 4 ounces of apricots will give you 50% of your daily allowance. They are also good for the blood – they can even alleviate anaemia better than liver! They are also a significant source of fluoride. Amazing.


This pie was invented by the great chef Carême. He is very particular about the type of pie dish you should use; it must be very shallow, not much deeper than a plate.


Halve 1 ½ pounds of fresh apricots and take out the stones. Next, melt 2 ounces of unsalted butter in a frying pan and stir in 8 ounces of caster sugar; this might seem alot but they really do need it. Over a moderate heat stir the sugar into the butter. After a few minutes it should start to melt. Add the apricots and coat in the butter-sugar mixture. Stir for a minute or two – you don’t want to cook the fruit, just get the apricot halves well covered.
Pile the fruit and butter and sugar, which should be toffee-like at this point, into a shallow pie dish.
Roll out some puff pastry. Cut strips around half and inch a glue them around the edge of the plate with beaten egg so that the strips ‘extend partway down the dish itself. This will create a good seal, preventing the apricots from escaping. Brush the strips with egg and cover.


Use a fork to seal the pastry lid then make a central hole so that any steam generated during cooking can escape. Brush with more egg and sprinkle some more caster sugar. Start the pie off in a hot oven – 230°C (450°F) – for 15 to 20 minutes so that the pastry can turn golden brown, then continue cooking at a lower heat of 160-180°C (325-375°F) for 15 minutes. ‘Serve hot or warm with plenty of cream.’

Sorry about the terrible pic.
I'm normally drunk by dessert...

#345 English Apricot Pie. What a delicious fruit pie! It occurred to me whilst I was eating it that I have never eaten apricots this way. Well it certainly won’t be the last time I do it; the sugar and butter became a deliciously sweet sauce and the cooked apricots softened and turned very tart. That Carême chap knew what he was talking about.